
Nicely, y’all, my chandelier isn’t completed, however not for lack of attempting. To say that the climate isn’t cooperating could be an understatement. This has been a really unusual July with a great deal of rain and ridiculous humidity, so nothing is drying prefer it ought to. My clay flowers are taking without end to dry. The spray paint that I used to color the chandelier and the flower “stem” body is taking without end to dry. The entire thing has been so irritating, however there’s not an entire lot I can do about it. It’ll get achieved when it will get achieved. So whereas I’m ready for issues to dry, I made a decision to make an easy DIY ornamental tray to go on my closet island utilizing wooden scraps and different objects I already had available. The one objects I needed to buy for this tray had been the handles.
Ornamental trays are such a simple and enjoyable mission, so when you’re a starting and in search of one thing to construct, otherwise you’re eager to strive your hand at artful issues like gold leaf or resin, a tray is an ideal technique to begin.
I used scrap wooden that I already had available, and I reduce a bit of 1/2-inch plywood to about 17″ x 19″ for the underside of my tray. Then I reduce some 1/2-inch wooden, ripped to 1.5 inches extensive, for the perimeters, reduce to size on my miter noticed. I nailed these in place utilizing 1-inch 18-gauge nails.
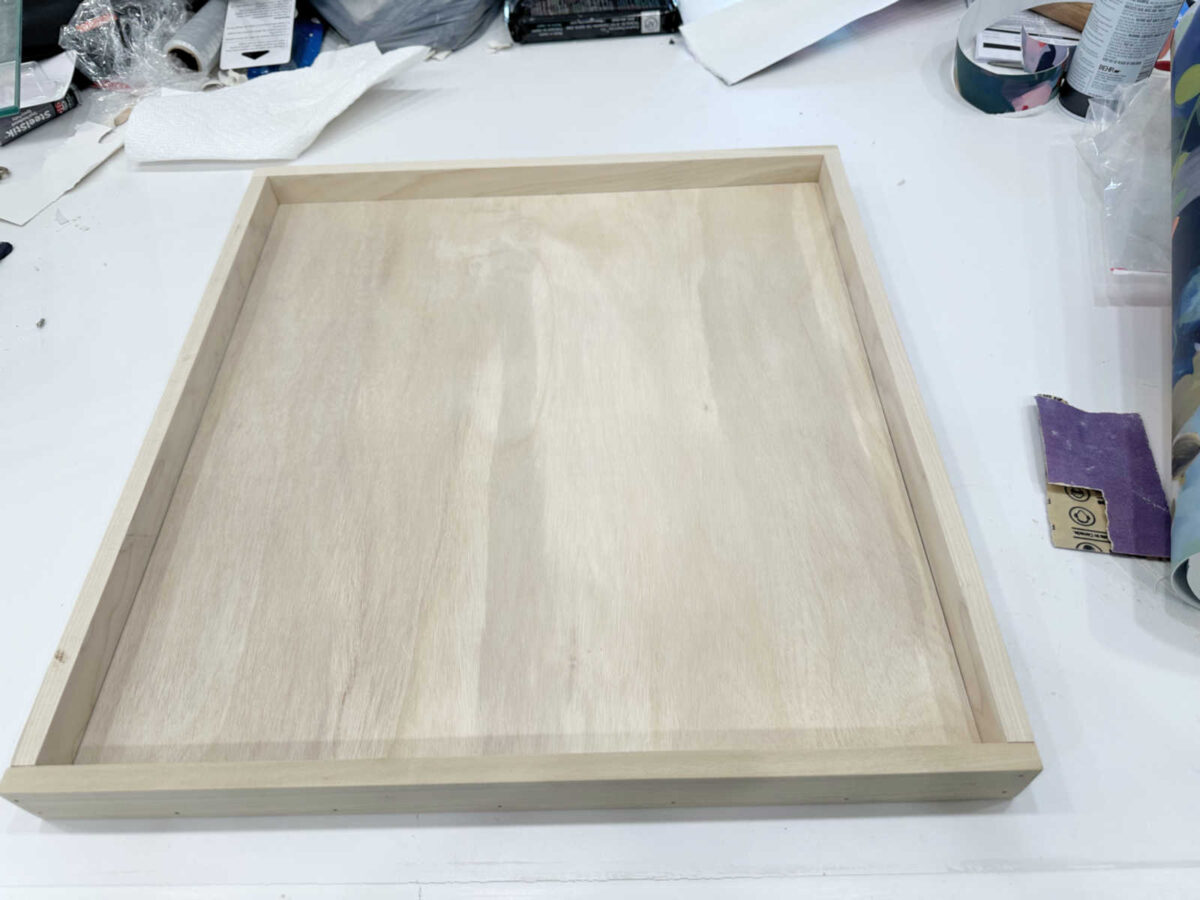
I didn’t even miter the corners as a result of they maintain collectively stronger after they’re not mitered. At the very least, that has been my expertise.

And as you possibly can see, the corners weren’t good once I nailed the aspect items on. However I wasn’t anxious about that as a result of these corners could be cleaned up within the subsequent steps.
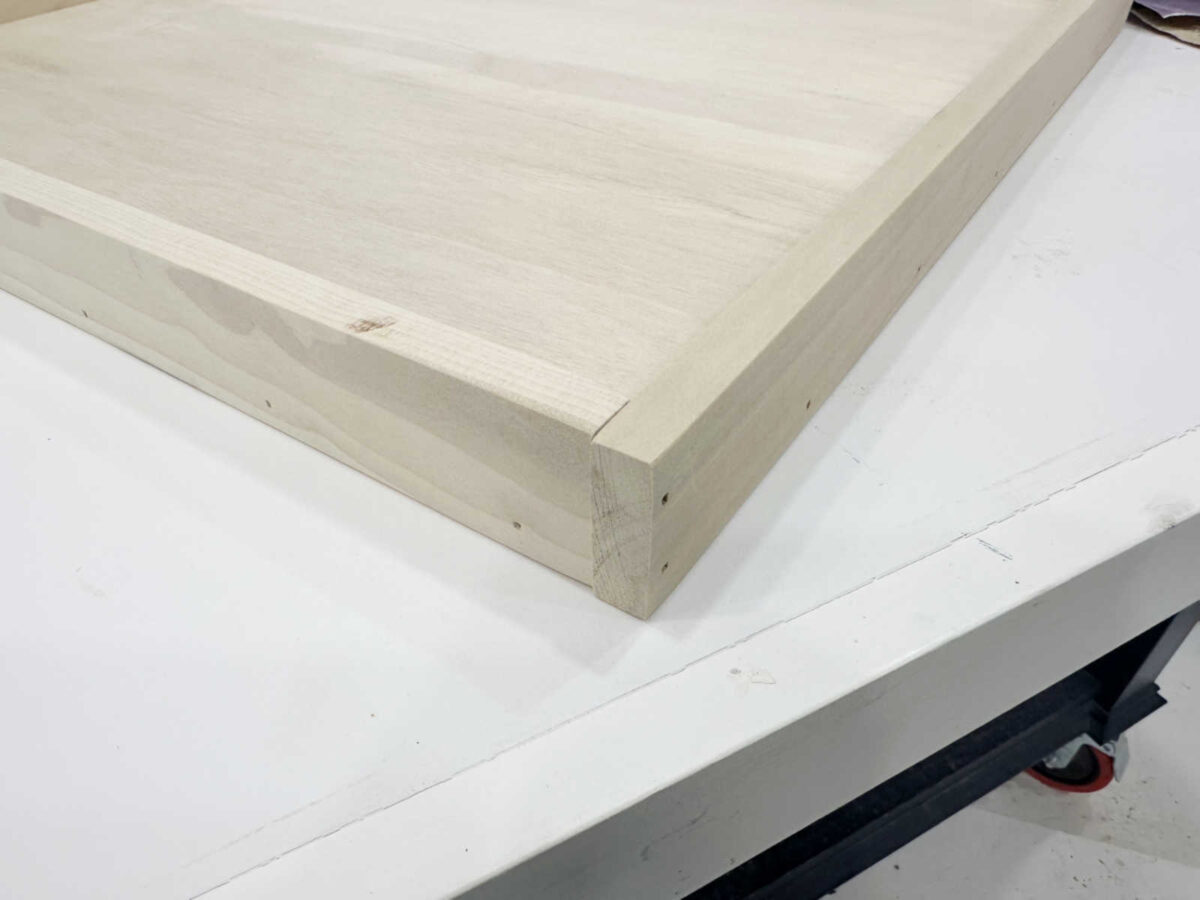
So right here’s what it appeared like as soon as the entire aspect items had been nailed to the underside piece and to one another on the corners. Then I used wooden filler to fill within the nail holes and nook joints.
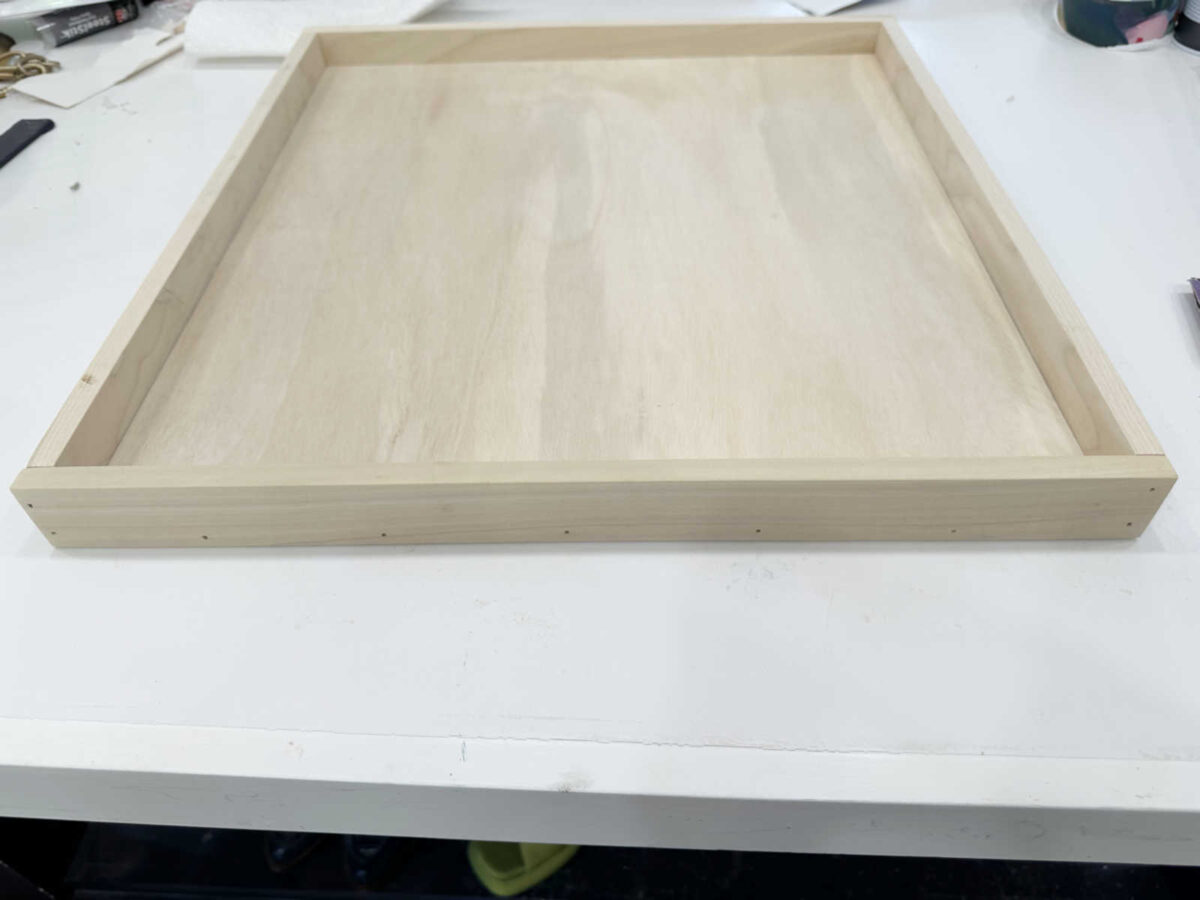
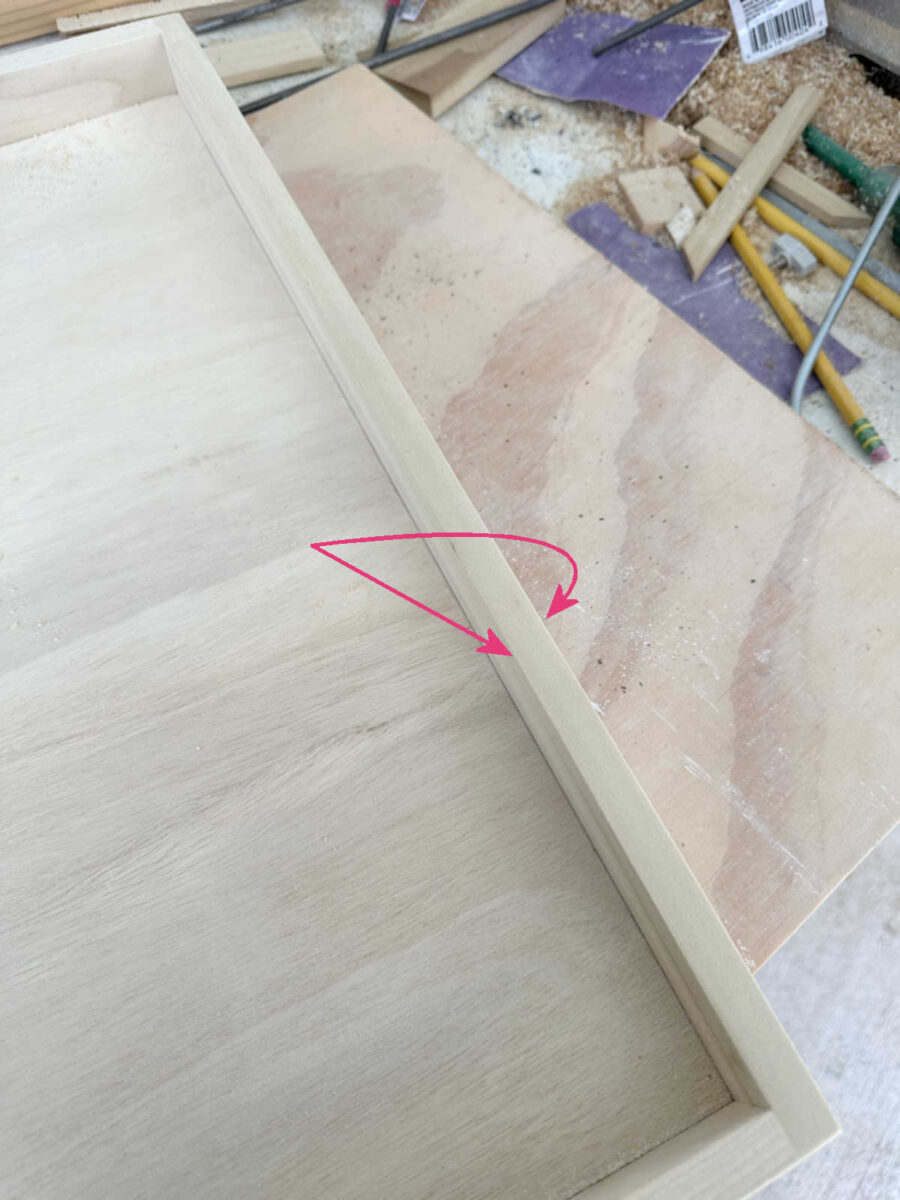
As soon as the wooden filler was dry, I used my rotary sander with a 150-grit sanding disc to sand the perimeters and the corners. As you possibly can see, the sanding course of actually cleaned up these corners and made them look very nice. I additionally sanded the highest edges of the aspect items in order that they had been clean and flush with one another across the high.
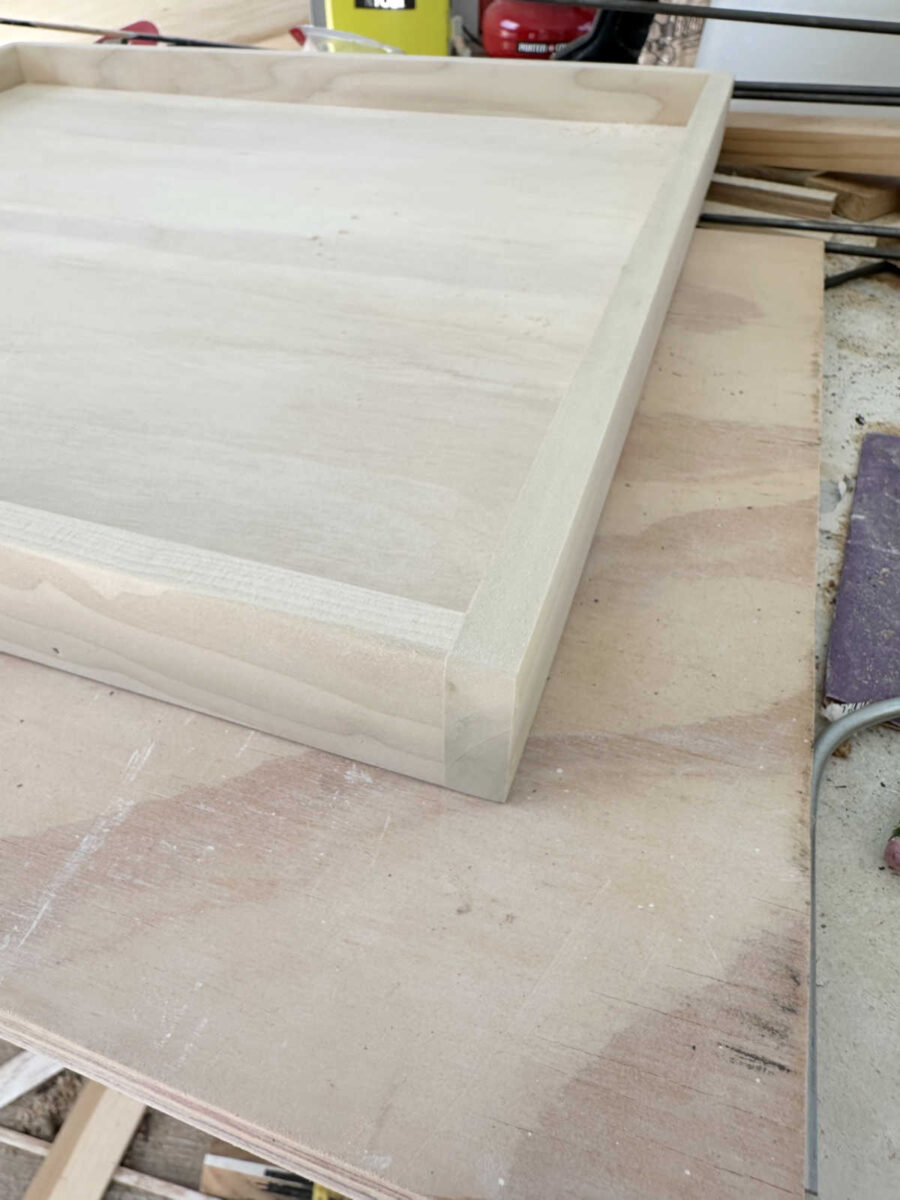
After which, as is my behavior, I used 150-grit sandpaper and sanded these corners on either side piece by hand to offer the cruel corners a little bit of a softer look.
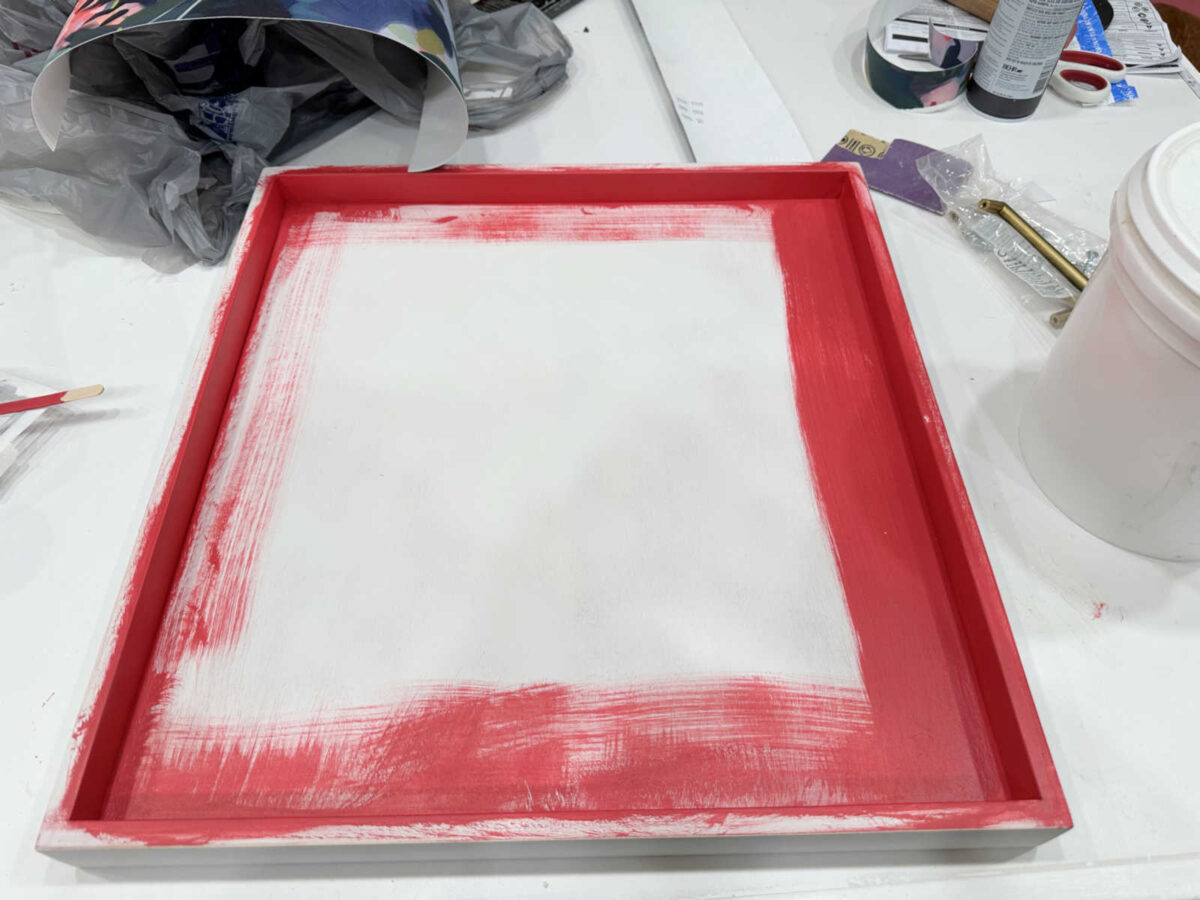
After spray priming the entire thing with my favourite primer — Zinsser B-I-N shellac-based primer, after which sanding the entire thing clean with 220-grit sandpaper, I used to be prepared to color. I used a darkish pinkish purple on the within of the aspect items to convey some coloration to the island.
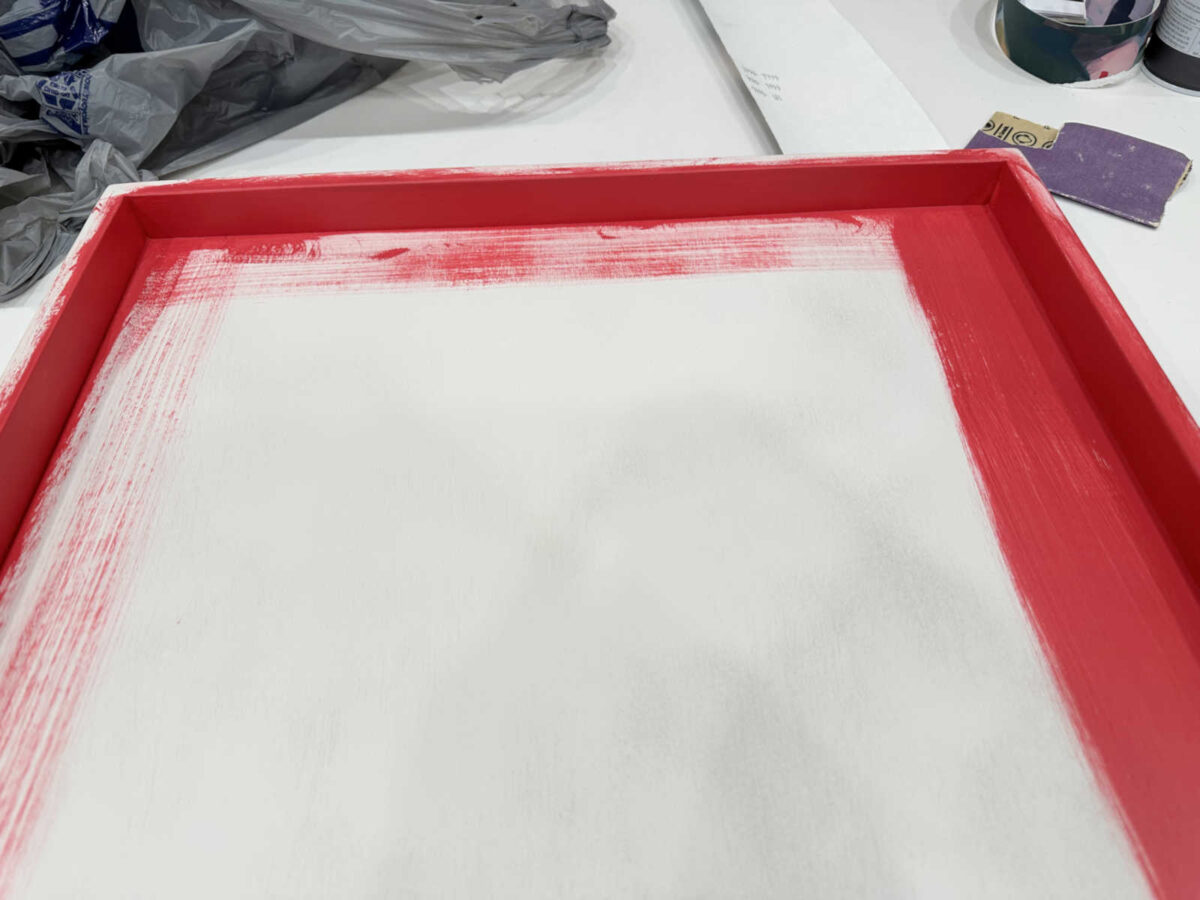
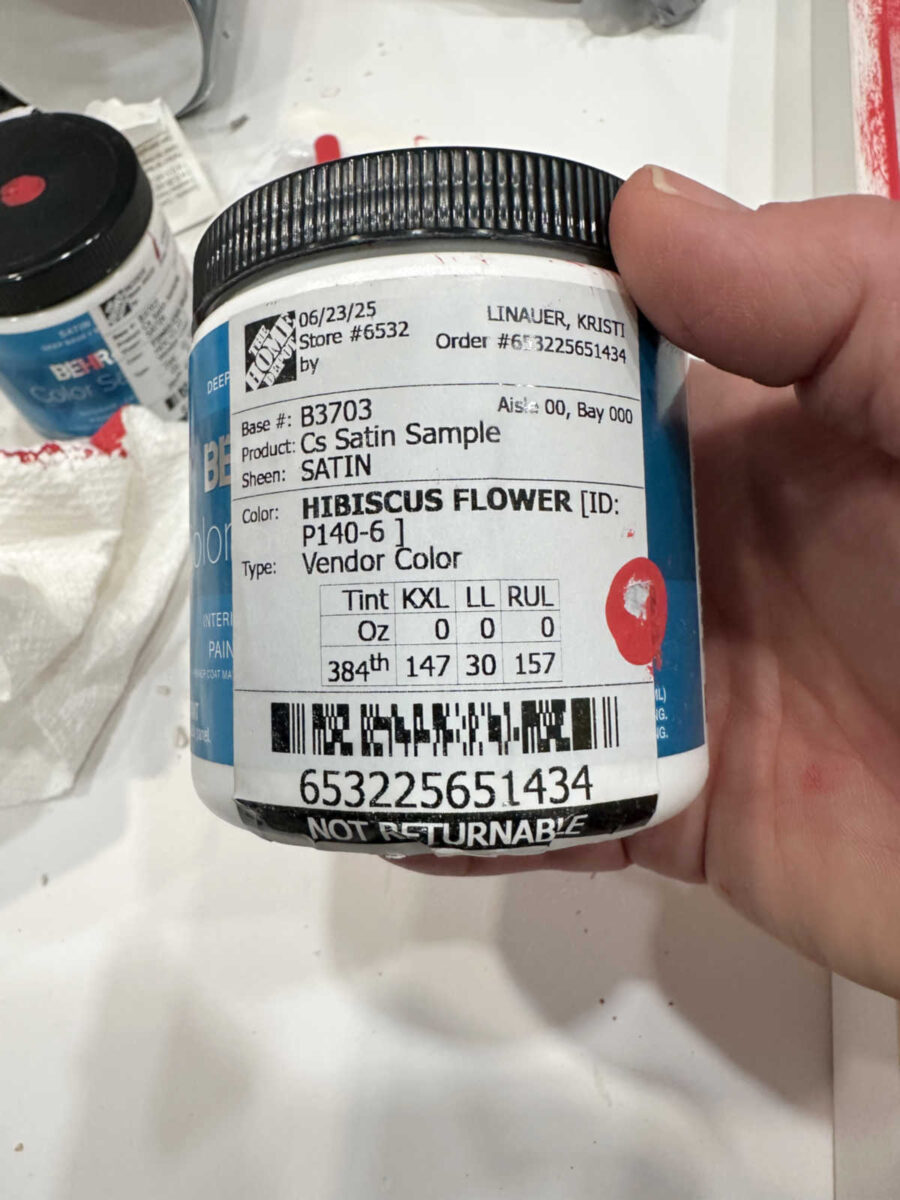
I used to colours for this. The principle coloration is Behr Hibiscus Flower.
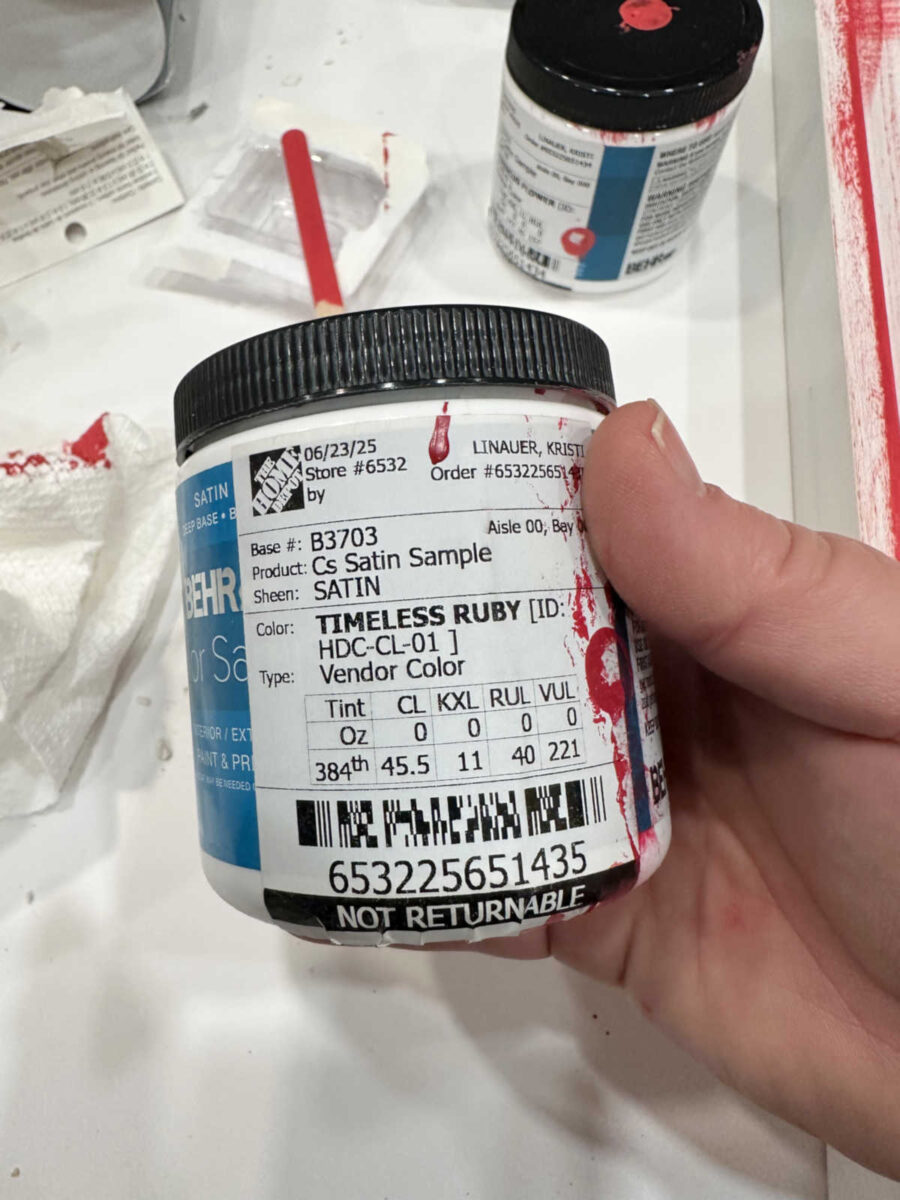
But it surely was a bit too vibrant by itself, so I added just a bit bit (perhaps two or three tablespoons) of Timeless Ruby to darken it only a bit.
That made the proper pinkish purple coloration to go along with the wallpaper. After which I painted the skin white as a result of I like the white in opposition to the darkish blue of the island. I used my go-to white — Behr Polar Bear — for the skin of the tray.
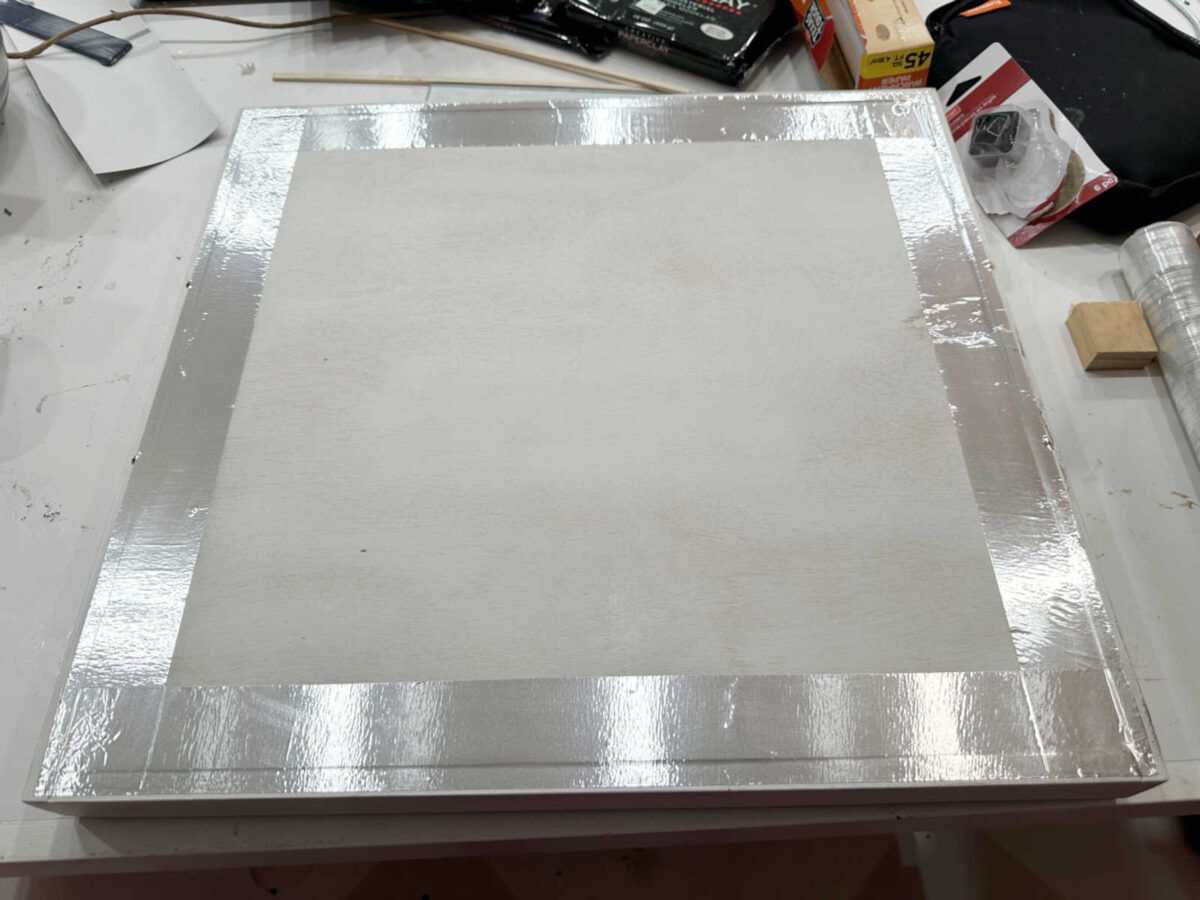
As soon as I had two coats of every coloration on and let it dry, I then added my wallpaper to the underside of the tray. I adhered this with wallpaper paste that I had leftover. As that was drying, I went forward and drilled my holes for the 2 handles.
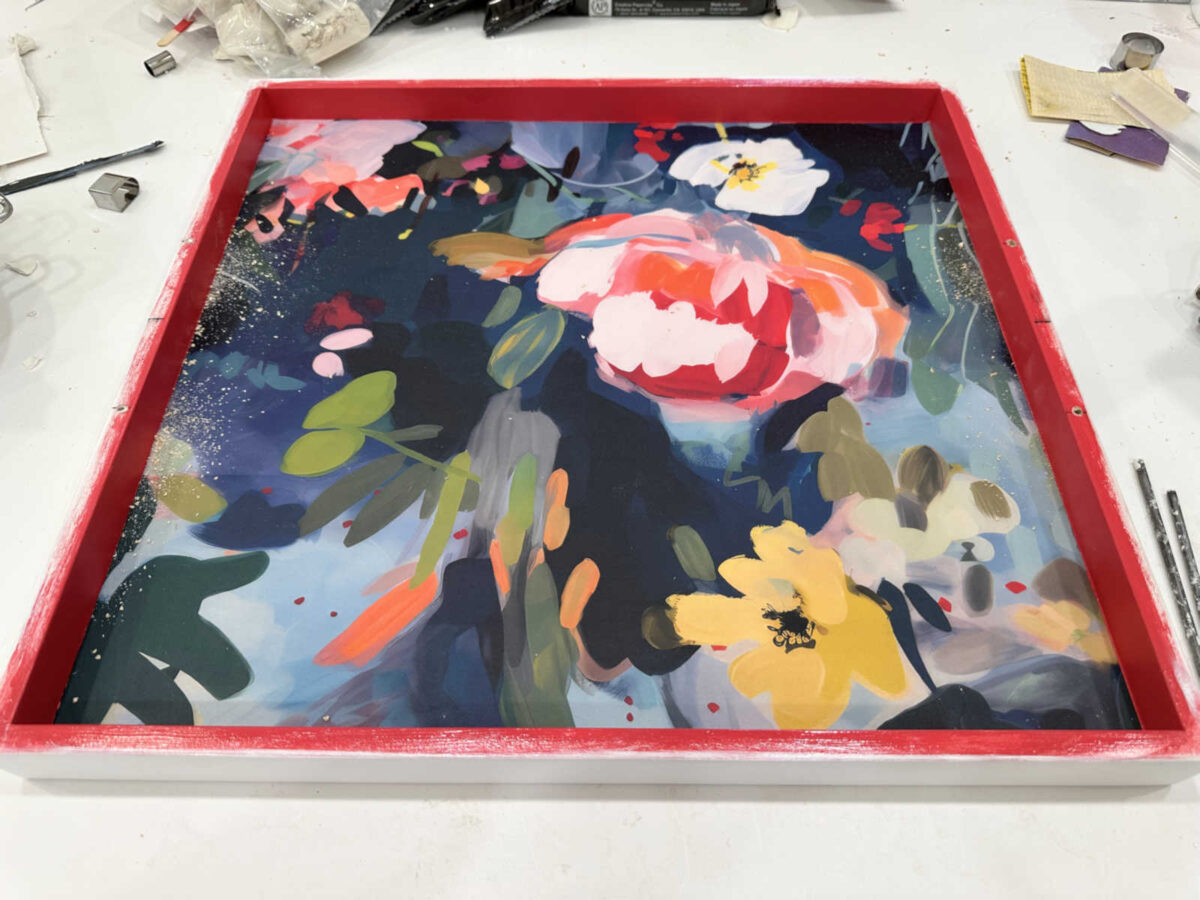
After which I added gold leaf to the highest edges of the aspect items. I used a metallic leaf glue that I had by no means used earlier than, and I actually favored it!
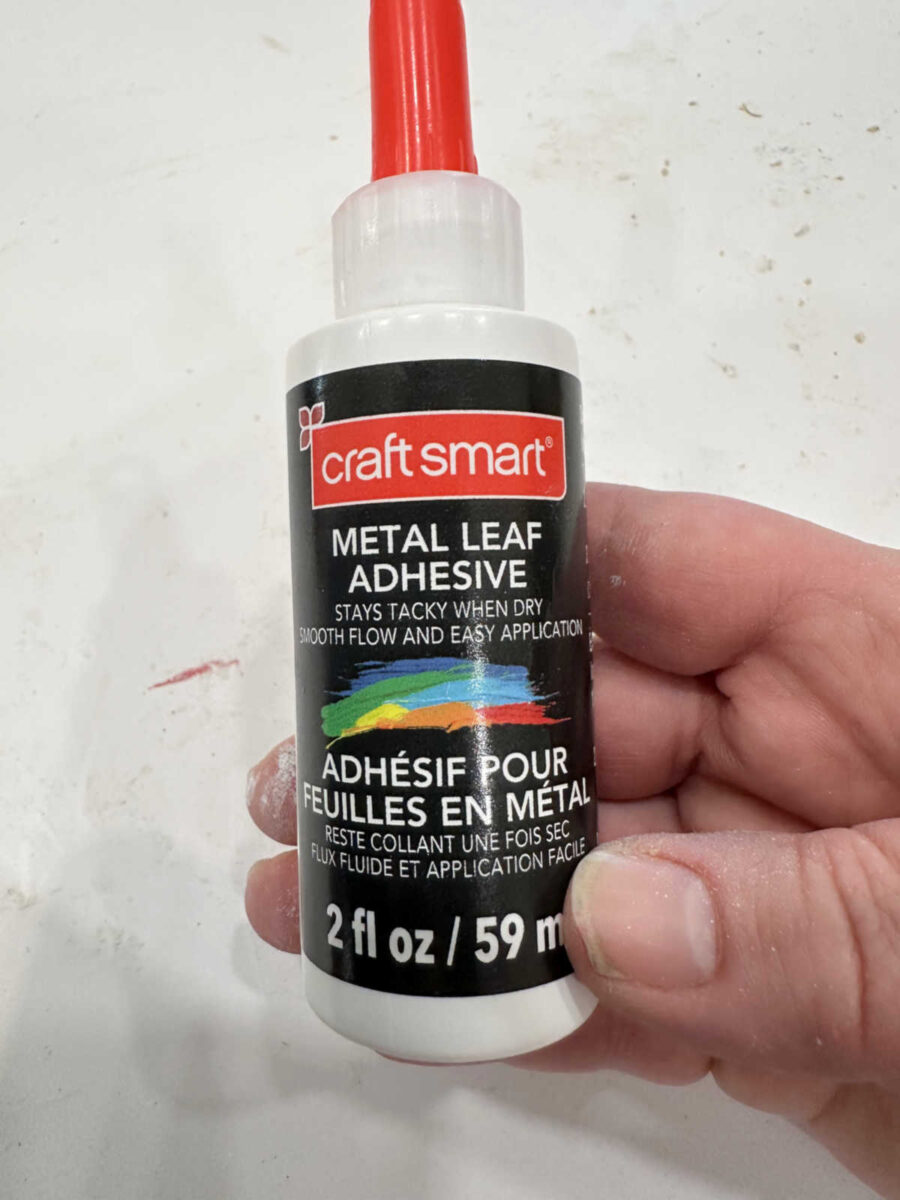
It goes on white and dries clear. As soon as it’s dry and glossy, you possibly can add the gold leaf.
If forgot to take an image of the gold leaf course of, however y’all have seen me gold leaf issues many instances previously. It’s a fairly self-explanatory course of. You press the gold leaf onto the adhesive, after which brush away any extra. It’s a fairly messy course of as soon as all of these gold leaf bits begin flying, however I totally take pleasure in it. There are metallic leaf merchandise that aren’t messy in any respect. The leaf comes connected to a backing, so that you don’t have all of these extra leaf bits flying round. I’ve by no means tried a type of, however I’d like to!
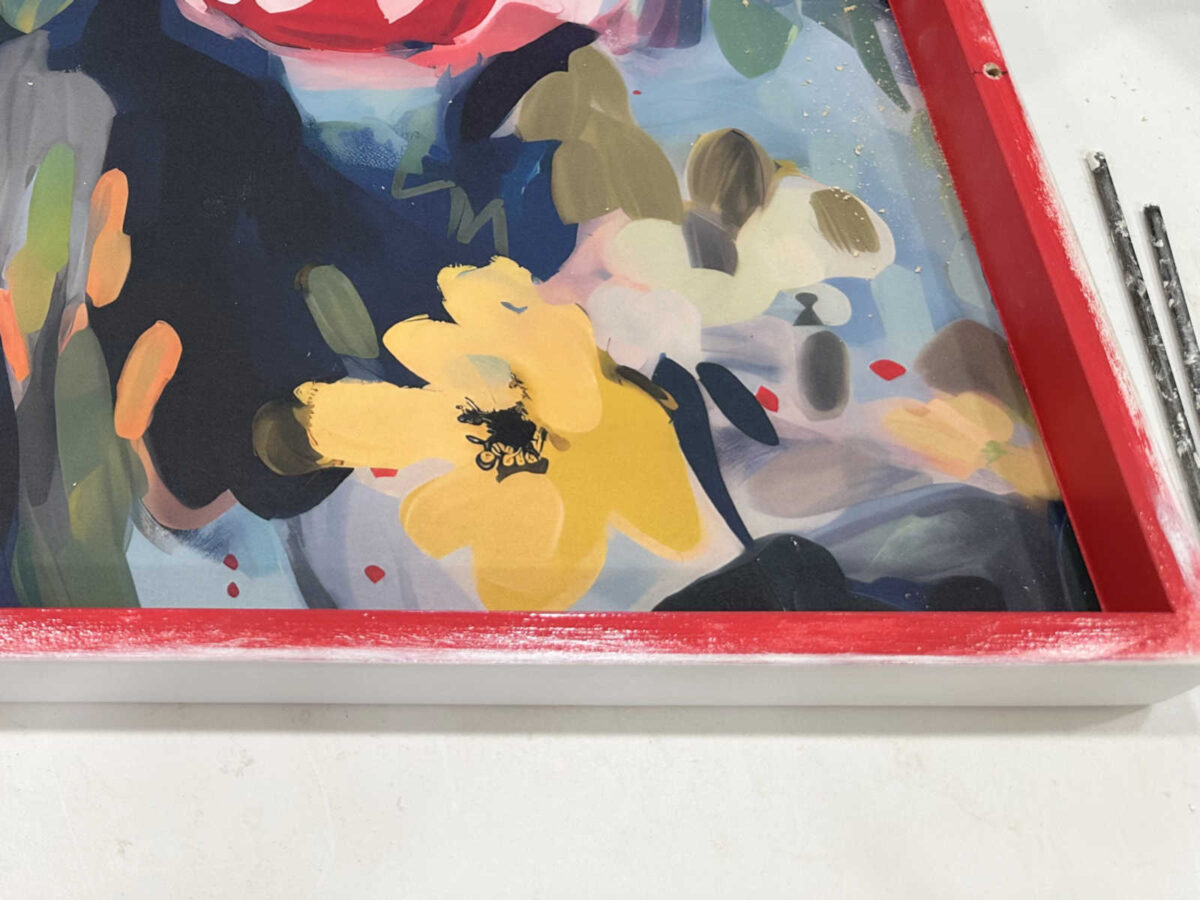
After the gold leaf was on and cleaned up, with the entire extra brushed away, I gave the entire painted and gold leafed areas two coats of Basic Finishes Excessive Efficiency Topcoat and let that dry. Then I used to be prepared to complete the wallpapered backside of the tray with resin. To maintain the resin from seeping by means of the joints the place the perimeters had been nailed to the underside of the tray, I turned the tray over and coated over these joints with metallic tape. You should utilize caulk for this as properly, however this appeared quicker and simpler since I wouldn’t have to attend for caulk to dry.
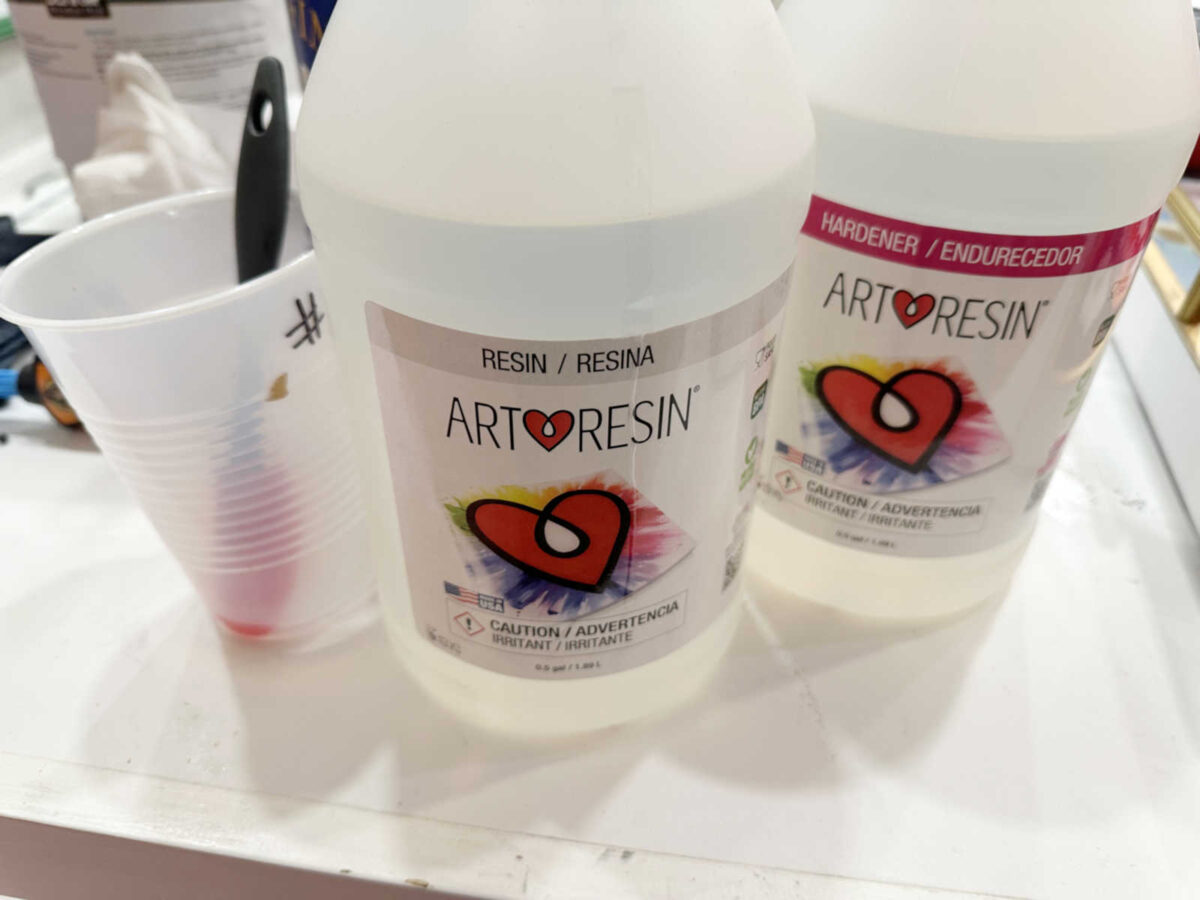
After which I combined up two cups of my favourite resin — ArtResin. For my 17″ x 19″ tray, I used one cup of resin and one cup of hardener to make two cups of combined resin.
I poured that over the underside, used a small spatula to clean it out over the underside, ensuring that it fully coated and met the entire sides and corners, after which used my Bernzomatic propane torch to eliminate the entire bubbles. The important thing with utilizing a propane torch on one thing like that is that you just wish to make very quick actions over the resin. If you happen to transfer too slowly or maintain it in a single place too lengthy, you’ll burn the resin, or worse, catch the wooden on fireplace. So making very brief, quick actions over the resin with the flame is essential, and you may goal any bubbles that you just see within the resin. My propane torch is type of massive, however when you’re eager to strive your hand at a resin mission, I’d really advocate one of many little propane torches which can be for kitchen use for caramelizing sugar. These are a lot simpler to manage. Additionally, I usually do the preliminary torching proper after I get the resin unfold out, after which I let it sit about quarter-hour and are available again and torch it once more since just a few new air bubbles at all times appear to seem throughout these first couple of minutes.
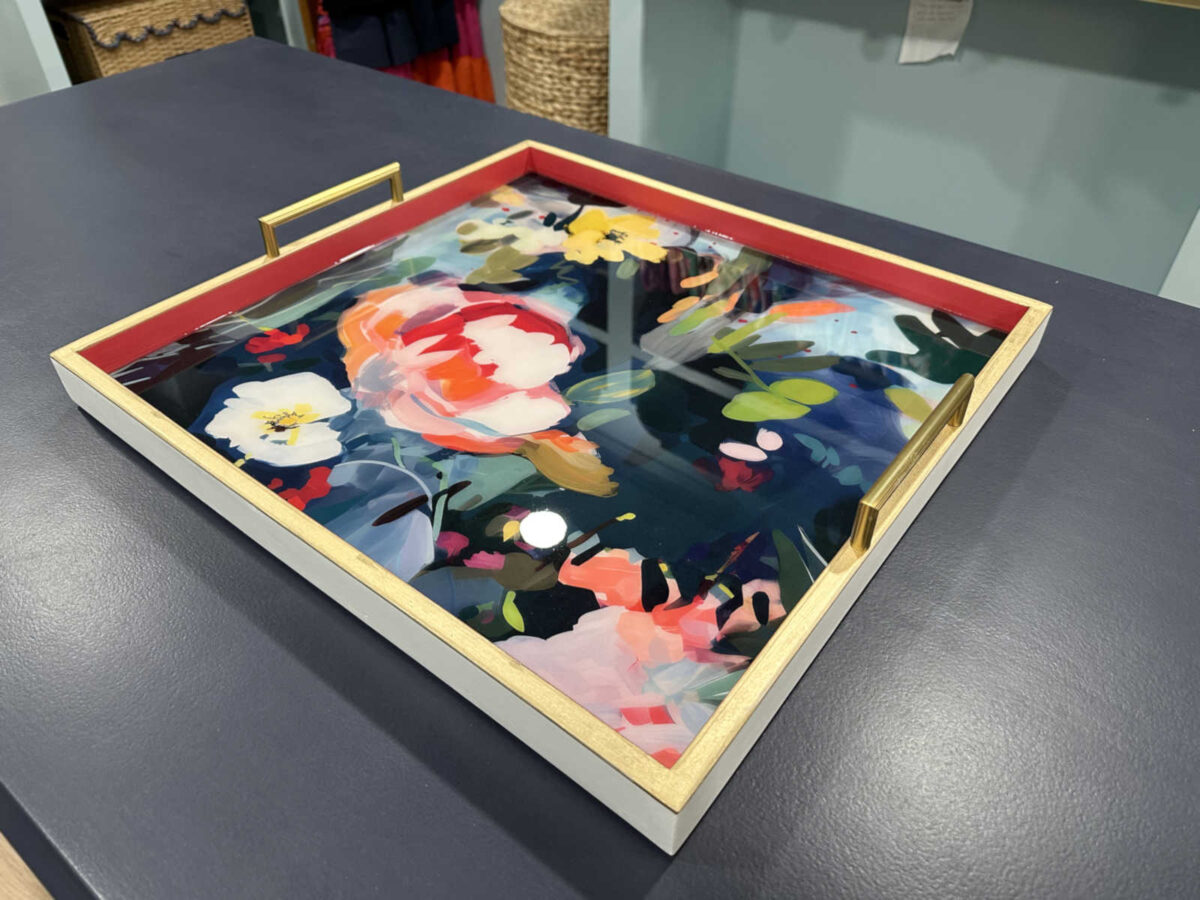
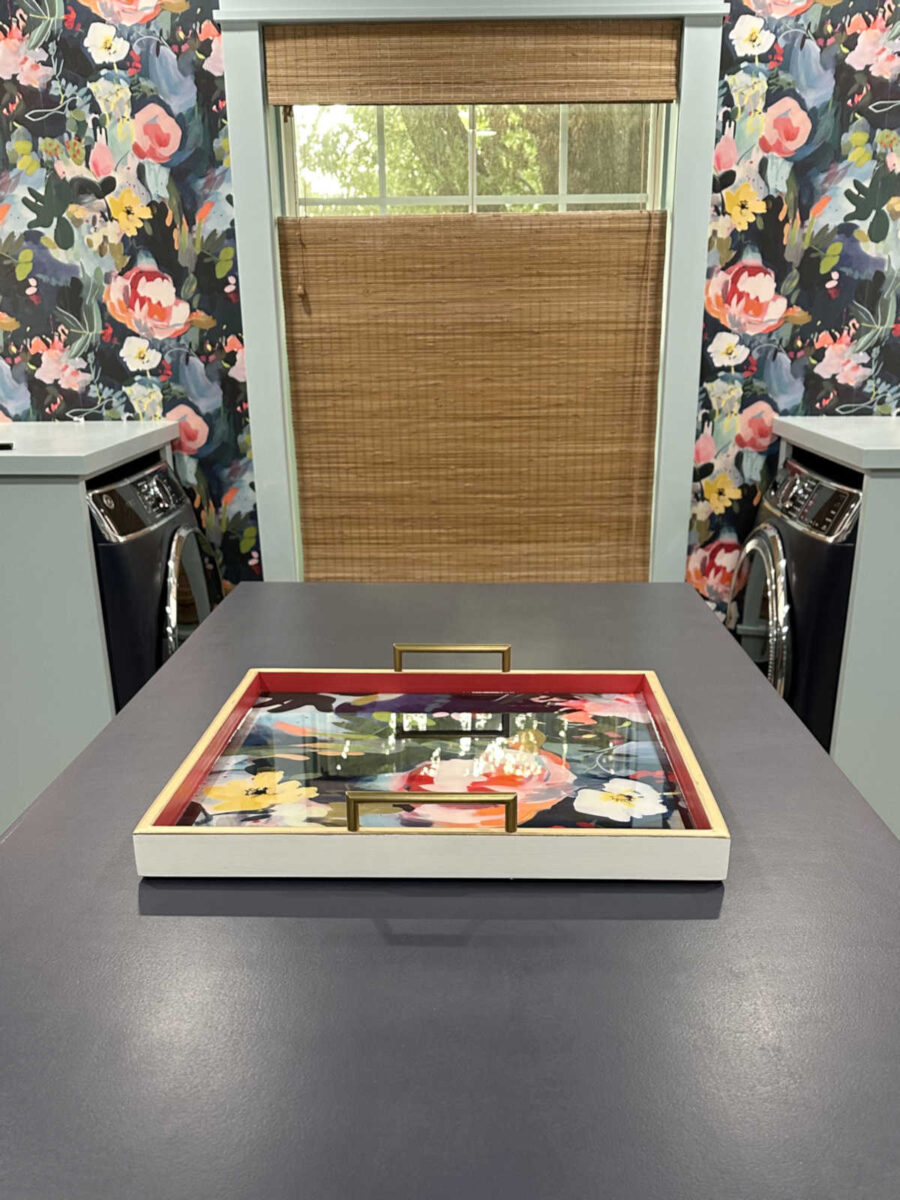
And right here is my new ornamental tray with the tremendous shiny resin wallpaper backside, a contact of pinkish purple across the inside, the gold leaf accent and gold handles, and the white on the skin.
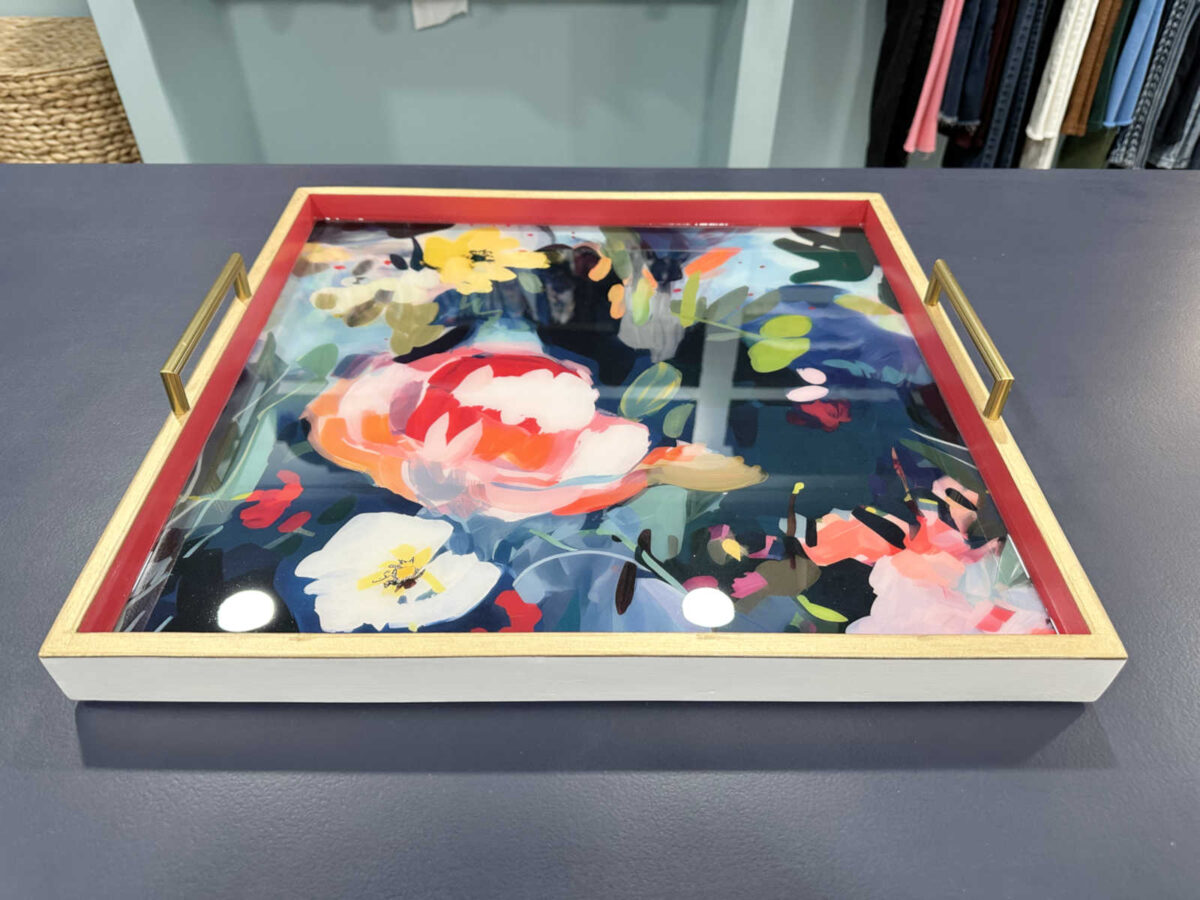
I needed to convey some pink and a few sample to the island, and I believe that is the proper manner to try this.
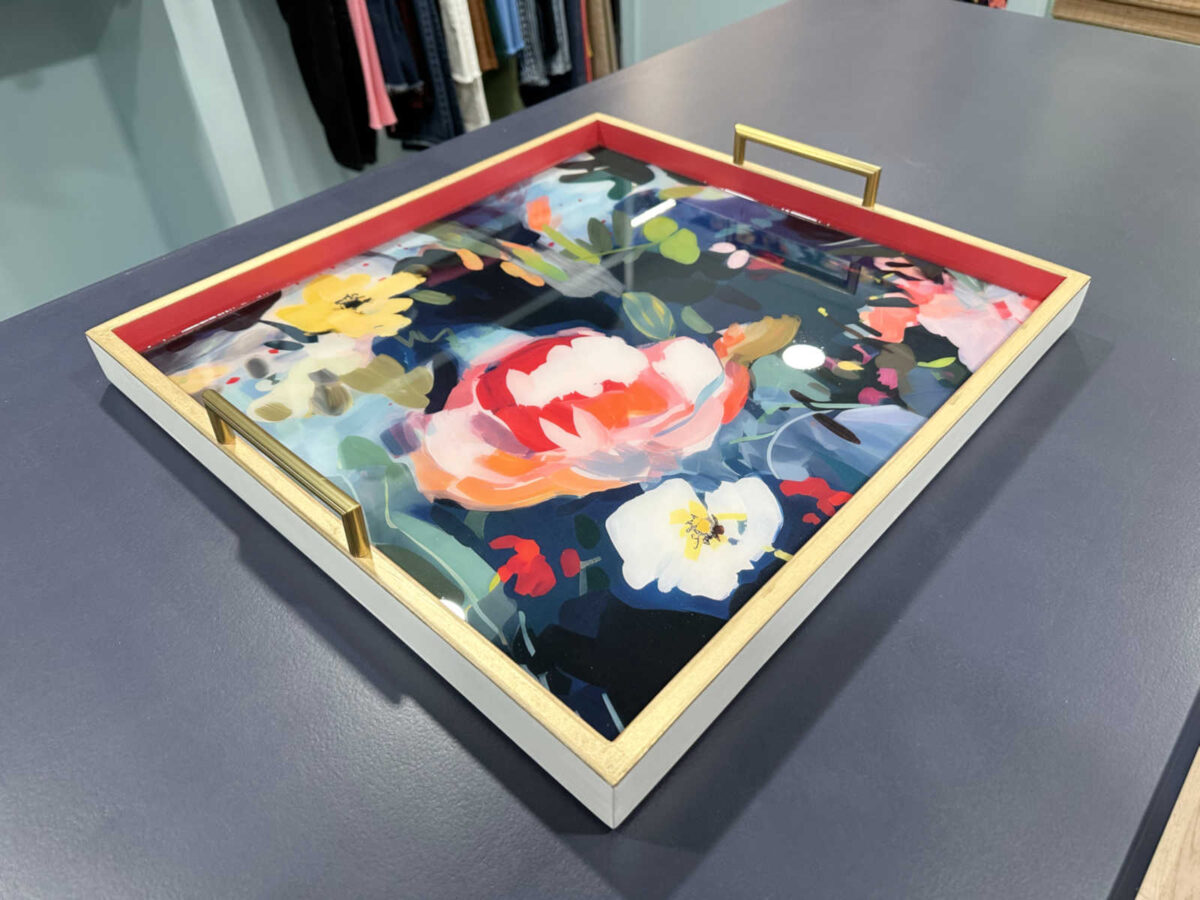
And I like how shiny that resin is. It provides the proper quantity of glimmer and shine to the island with out being overbearing.
This mission was a enjoyable little diversion whereas ready for paint and clay to dry.
I checked on the chandelier and flower stem body this morning, and I believe these are lastly dry sufficient to put in them immediately. However the flowers nonetheless aren’t dry sufficient to prime and paint. If y’all have any recommendations on how you can get air dry clay to dry quicker with out it cracking, I’d love to listen to it!
Extra About My Stroll-In Closet/Laundry Room

see all walk-in
closet diy tasks

learn all walk-in
closet weblog posts

Addicted 2 Adorning is the place I share my DIY and adorning journey as I transform and embellish the 1948 fixer higher that my husband, Matt, and I purchased in 2013. Matt has M.S. and is unable to do bodily work, so I do nearly all of the work on the home on my own. You can learn more about me here.
Trending Merchandise

UpCircle Rodillo de ojos 1 pieza – Para...

ESSENCE BRILLO DE LABIOS VOLUMINIZADOR WHAT T...


COSRX Advanced Snail 92 All in One Cream, 100...


