
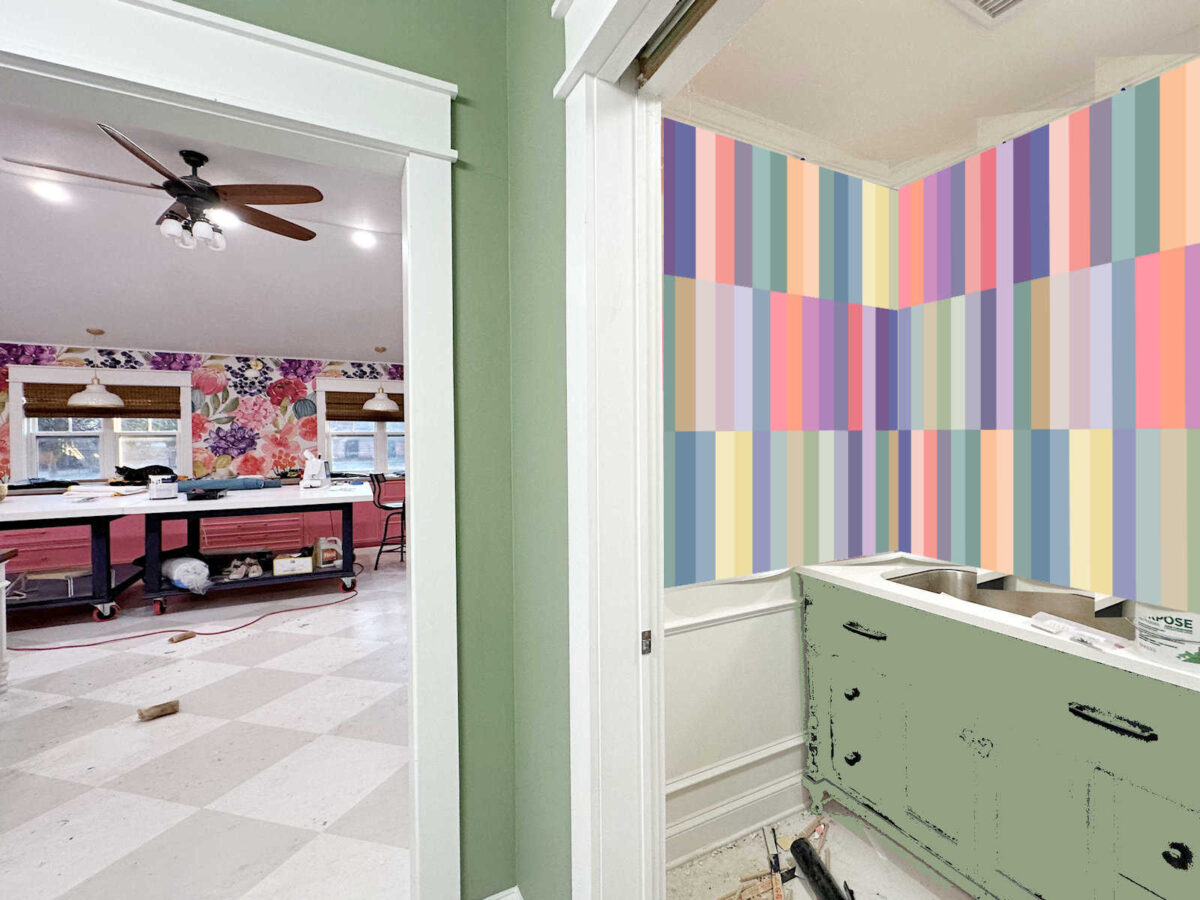
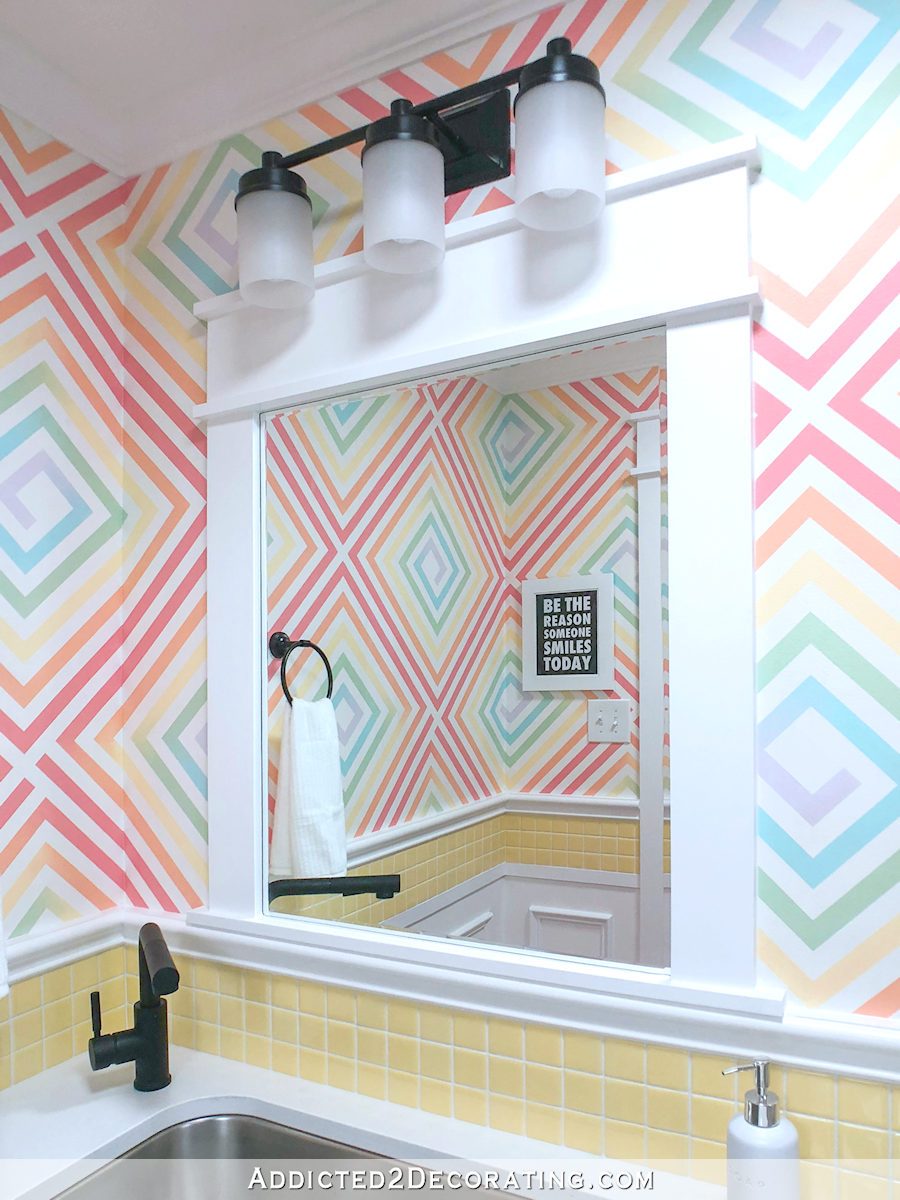
I bought the painted striped wall design completed on the primary partitions of the lavatory, and I’ve to say, that is my absolute favourite wall design I’ve ever painted. Y’all! I can’t cease taking a look at these partitions! Right here’s how they turned out.

These partitions exceeded my expectations. I knew that I might love them from the mockup that I did. Right here’s a take a look at that for reference.
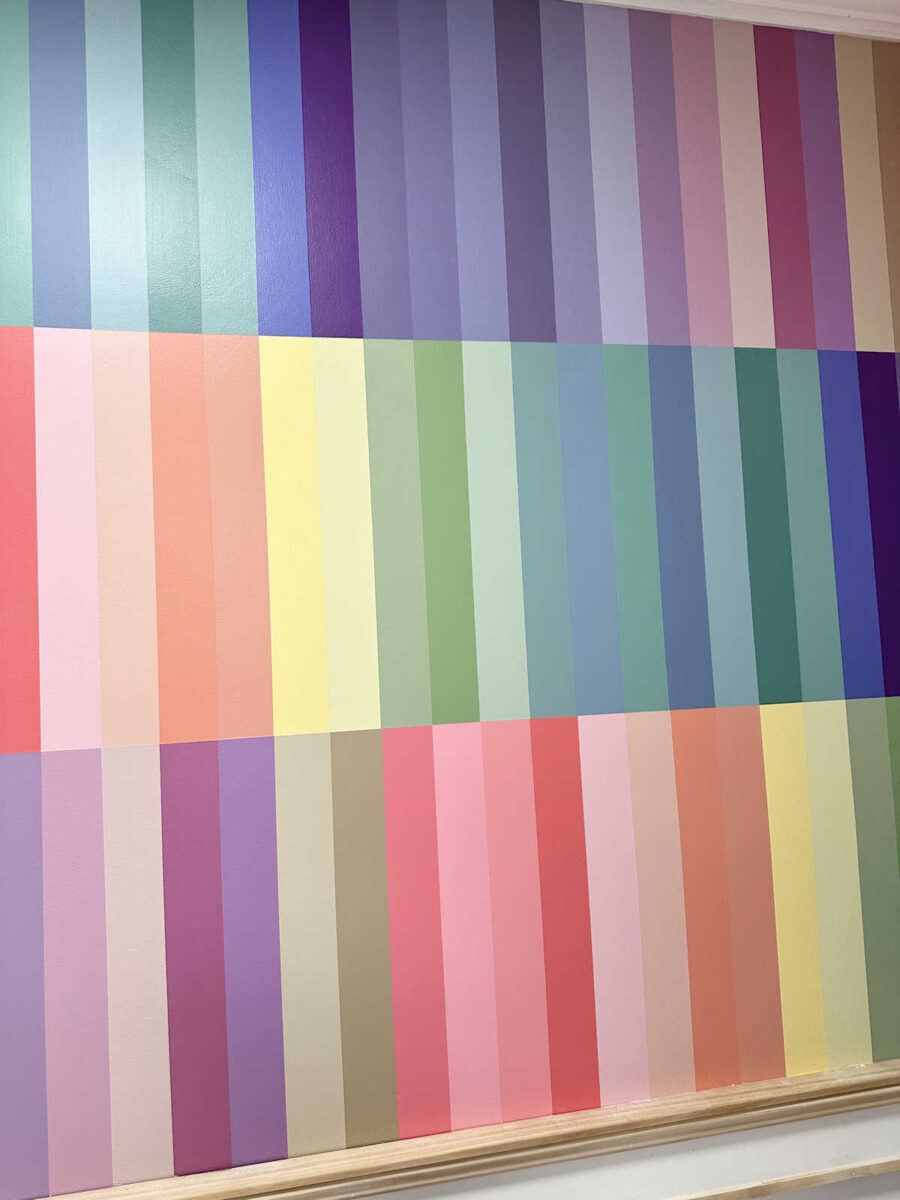
I liked that mockup, however when it got here to portray the precise design on the partitions, I made a decision to group like colours collectively relatively than having them in a random order like they’re within the mockup. I’m actually glad I did that as a result of I nonetheless have a complete lot of coloration (once more, 35 colours!), however I feel placing like colours collectively helped to calm the design down only a bit.
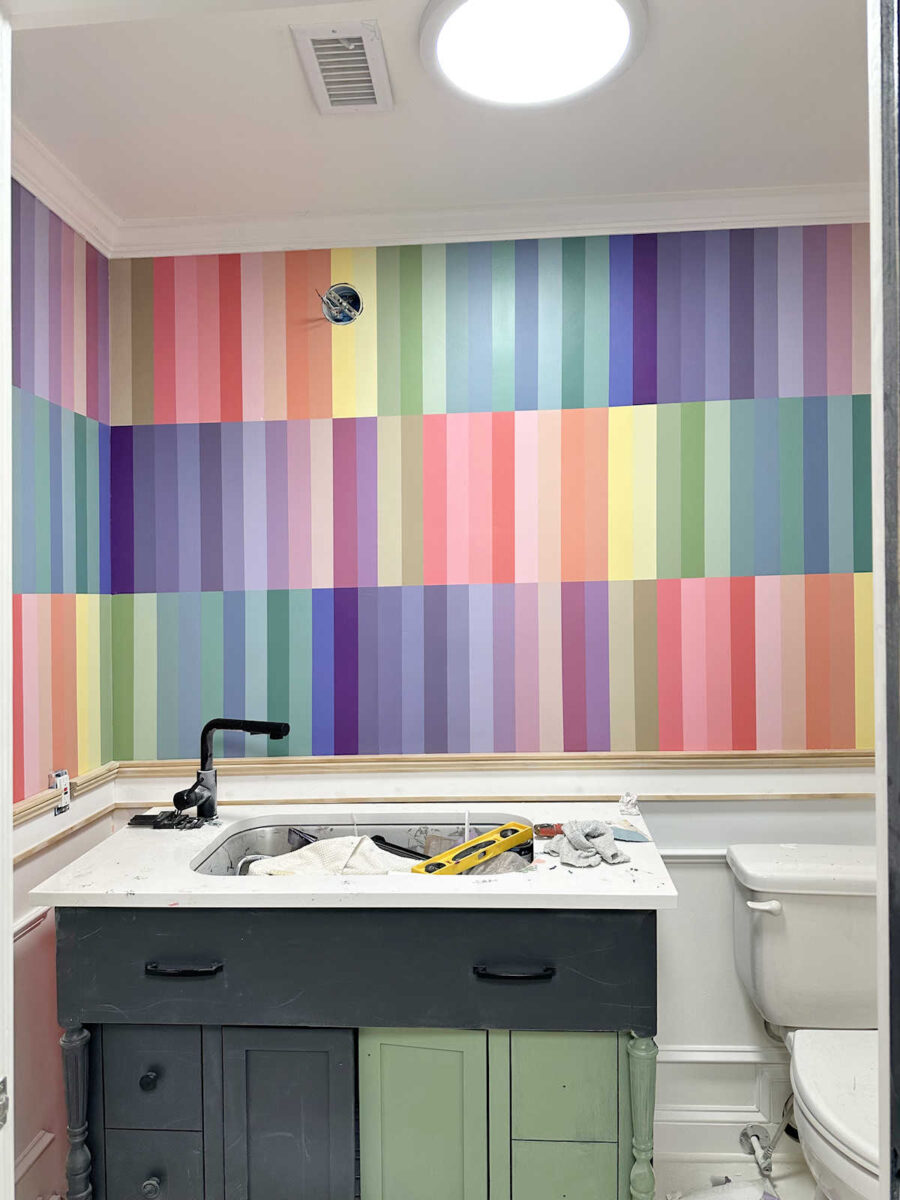
I’m completely thrilled with this. I don’t assume I might adore it any greater than I do. There are a few particular person colours that I wasn’t so loopy about as soon as I put them on the partitions, and whereas the partitions had been nonetheless in course of, I believed I would return and swap these colours out for one thing else. However as soon as the entire thing was executed and the entire painters tape was eliminated, these couple of didn’t hassle me in any respect. So ultimately, I made a decision to maintain them and transfer on.
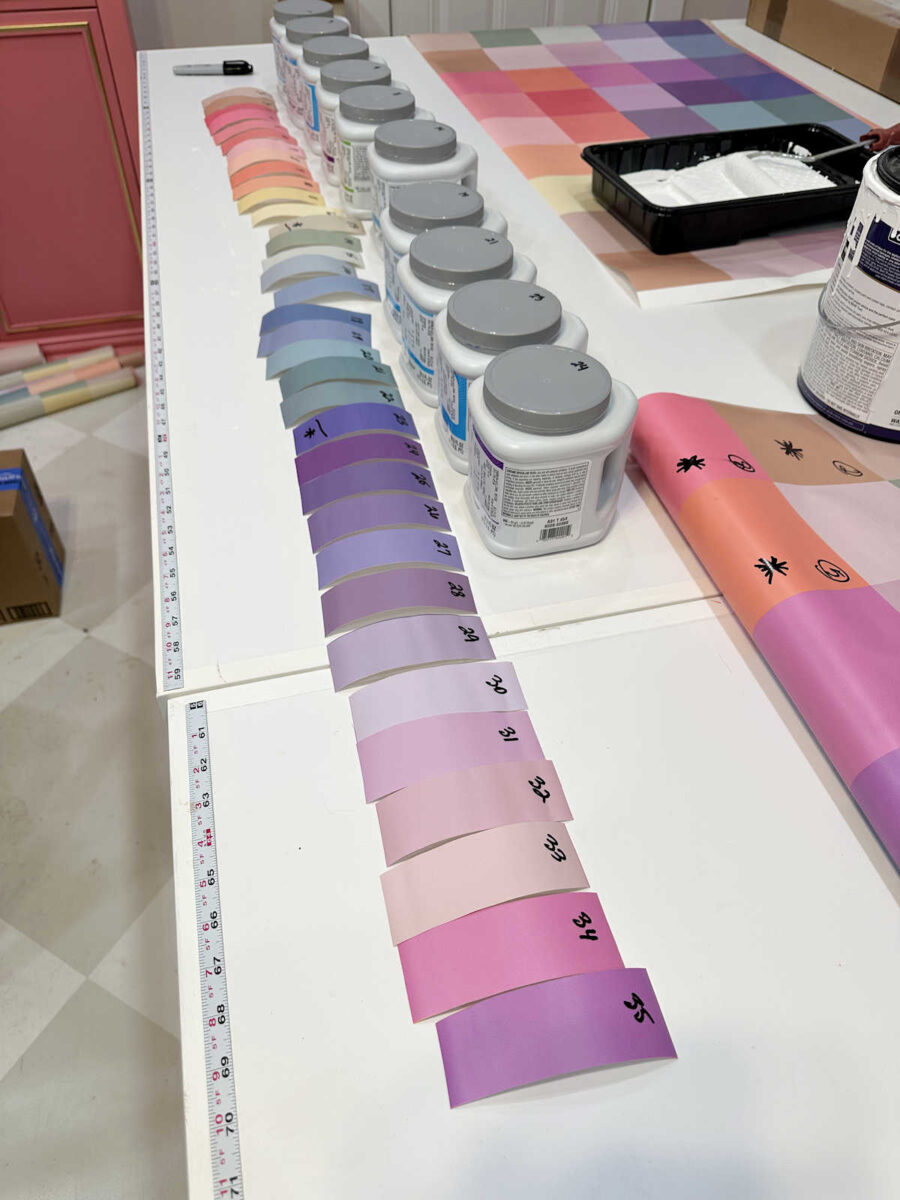
So right here’s a very fast evaluate of the entire course of from starting to finish. I had initially designed wallpaper for this room, however putting in the wallpaper was an actual catastrophe. You can read about that here. So I made a decision to color a design on the partitions utilizing the 35 completely different colours within the wallpaper, which you’ll see on my worktable within the photograph beneath. I made a decision to go along with stripes as an alternative of squares (clearly), so I then organized the colours within the order that I needed the strips to go.
Then I marked the vertical traces for the stripes on the partitions utilizing a pencil, and to make issues as straightforward as doable, I simply went with the width of my stage for the width of the stripes. That manner, there was no measuring and marking required for the stripe width.
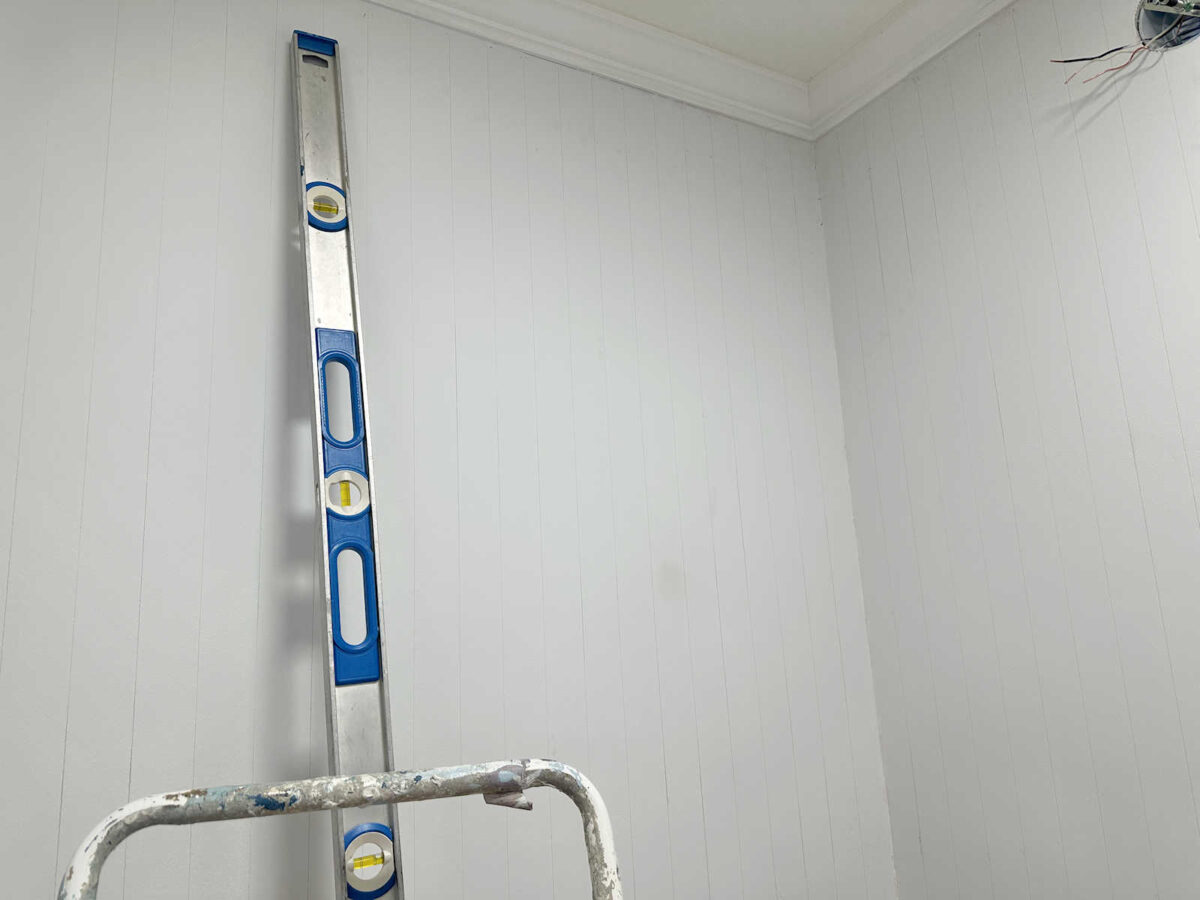
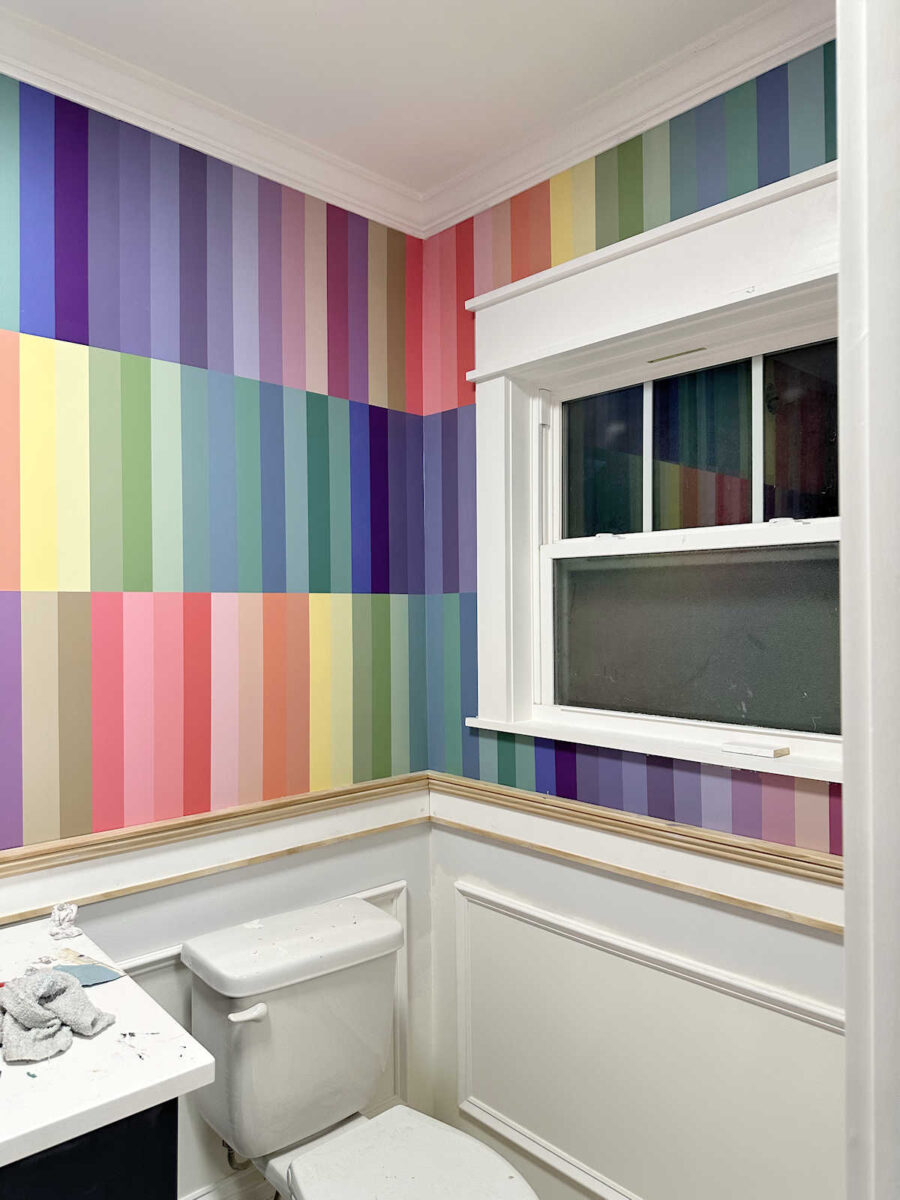
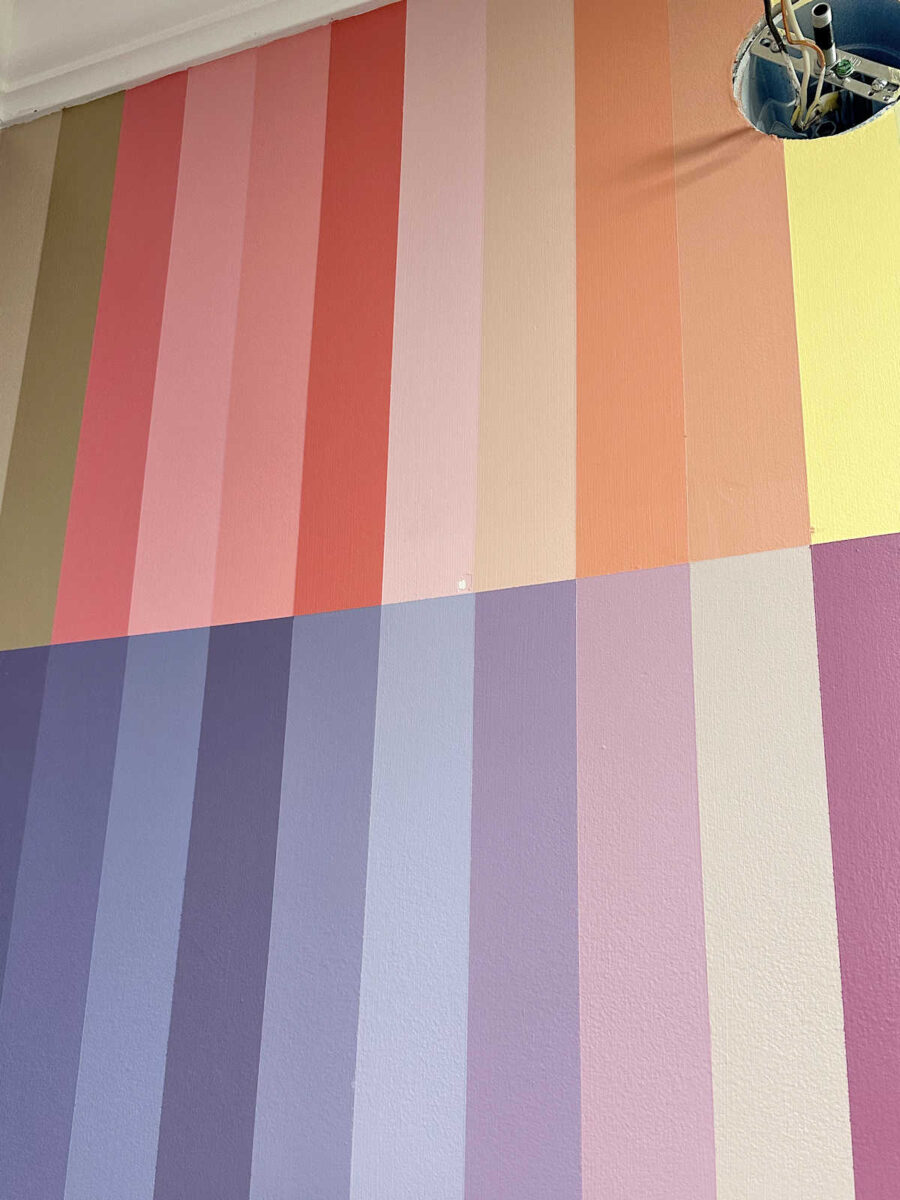
As soon as the vertical traces had been drawn, I divided the partitions into thirds and marked two horizontal traces going all the way in which across the room. The traces are faint, however I feel you possibly can see them right here.
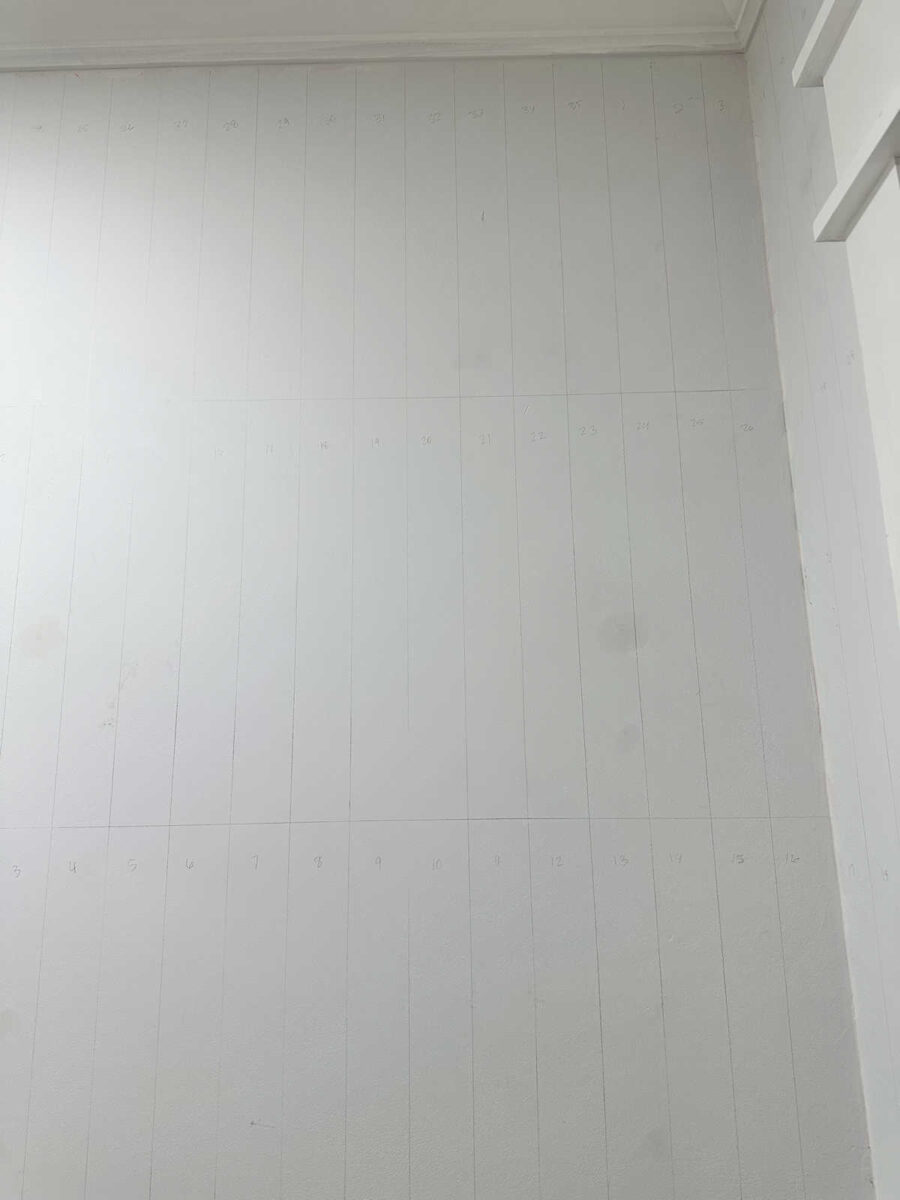
With all of my traces drawn, I then numbered every stripe. I began on the highest row, and numbered the stripes from 1 to 35 all the way in which across the room. On the second row, I began beneath stripe quantity 13 on the highest row and commenced numbering the second row from 1 to 35 all the way in which round. After which I repeated that on the underside row. After which I taped off the stripes on the highest and backside rows and commenced portray.
As soon as the highest and backside rows had been completed and the entire tape was eliminated, the partitions appeared like this.

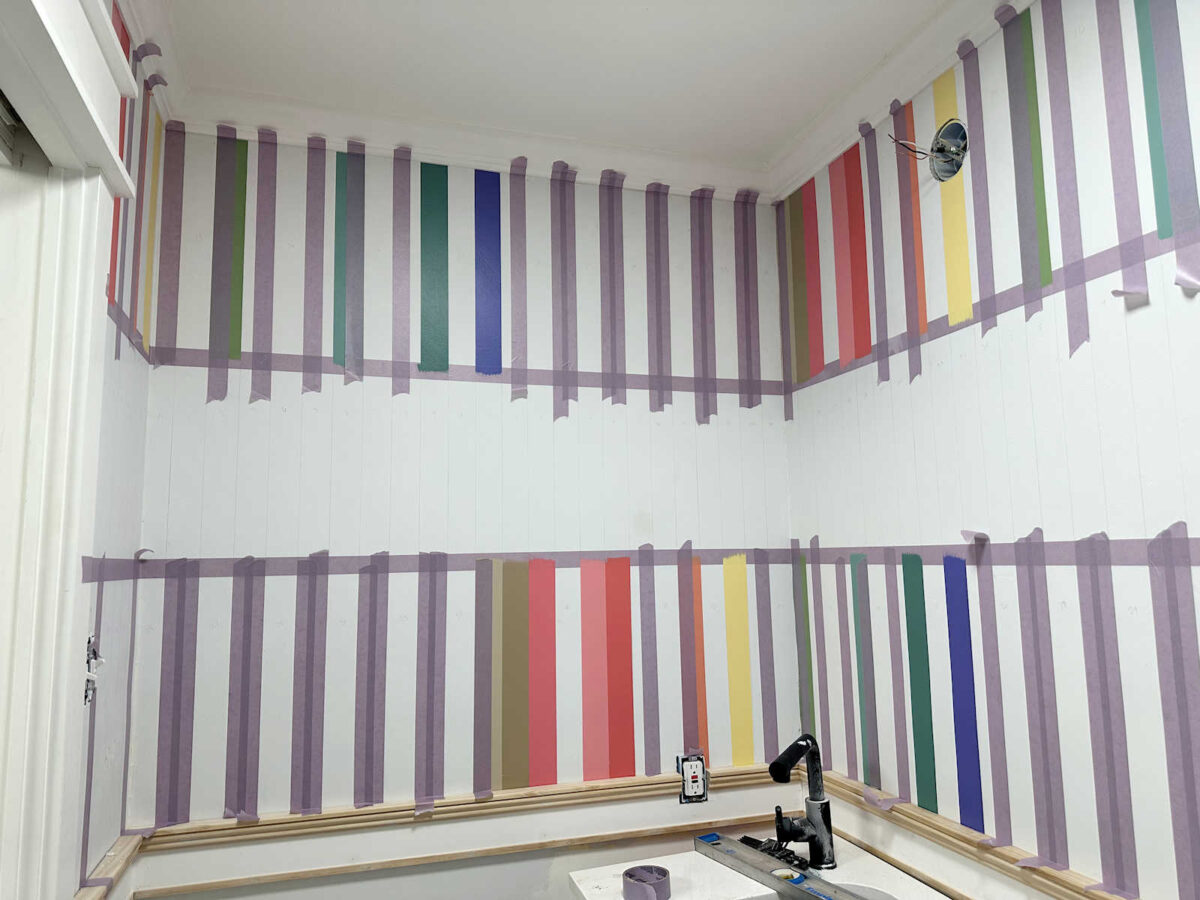
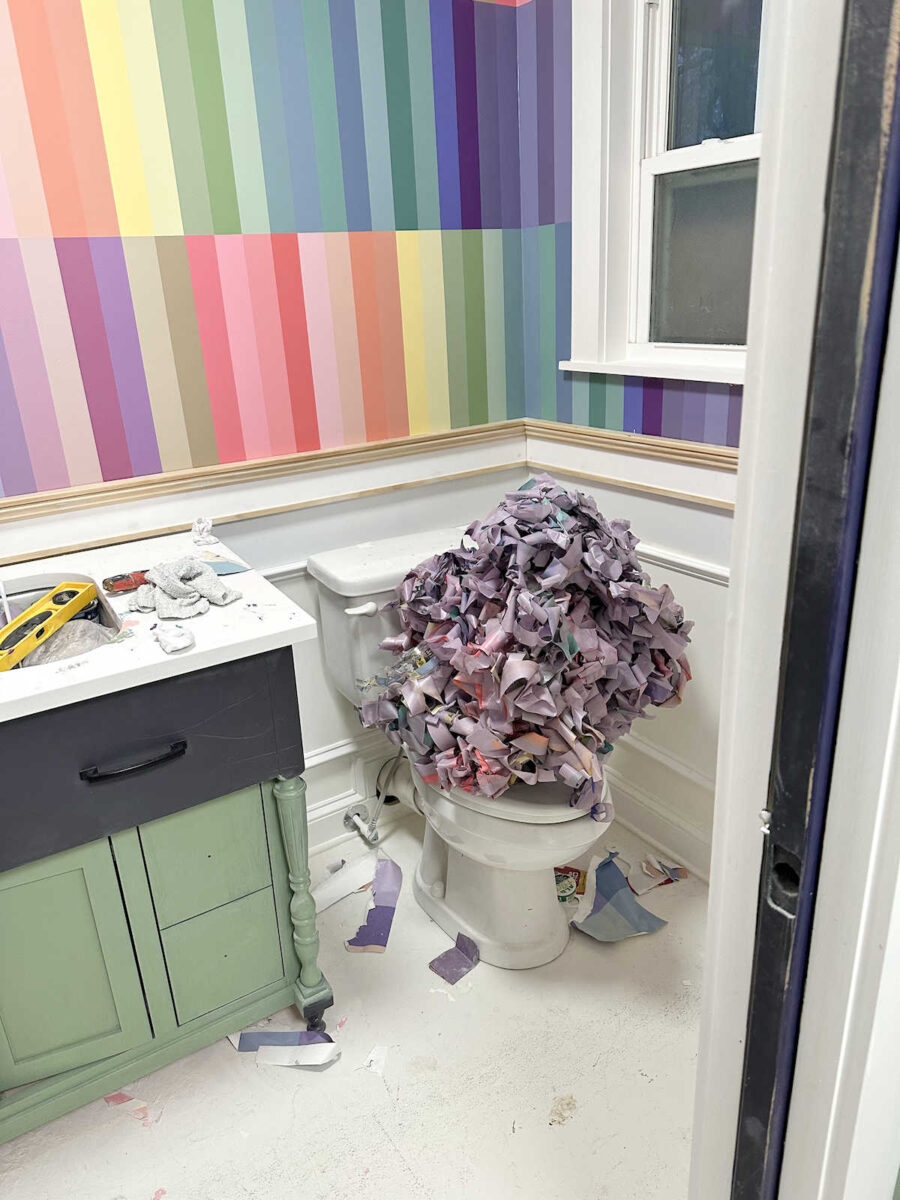
As soon as I had the entire high and backside row stripes painted, I got here again and taped off the center row and painted these stripes.

Clearly, I might solely tape off and paint each different stripe at a time. As soon as these stripes had been utterly dry, I got here again and taped off the remainder and painted these. Listed below are the 2 crucial ideas I can go alongside on a challenge like this:
- Solely use painters tape for delicate surfaces. When you use common painters tape on freshly painted stripes, it should peel the paint off.
- Earlier than portray every stripe, use a moist rag to press the painters tape down rather well on the wall and to additionally take away the entire pencil marks. Pencil marks will typically bleed via paint, so don’t at all times rely on the paint overlaying over pencil marks. However wiping the sides of painters tape with a moist rag proper earlier than portray additionally helps to get actually crisp traces with out the paint bleeding beneath the tape.
Through the use of that course of, I used to be truly very amazed at how few areas wanted touchups in any case of that portray and taping. The tape peeled off this tiny little spot beneath the window.

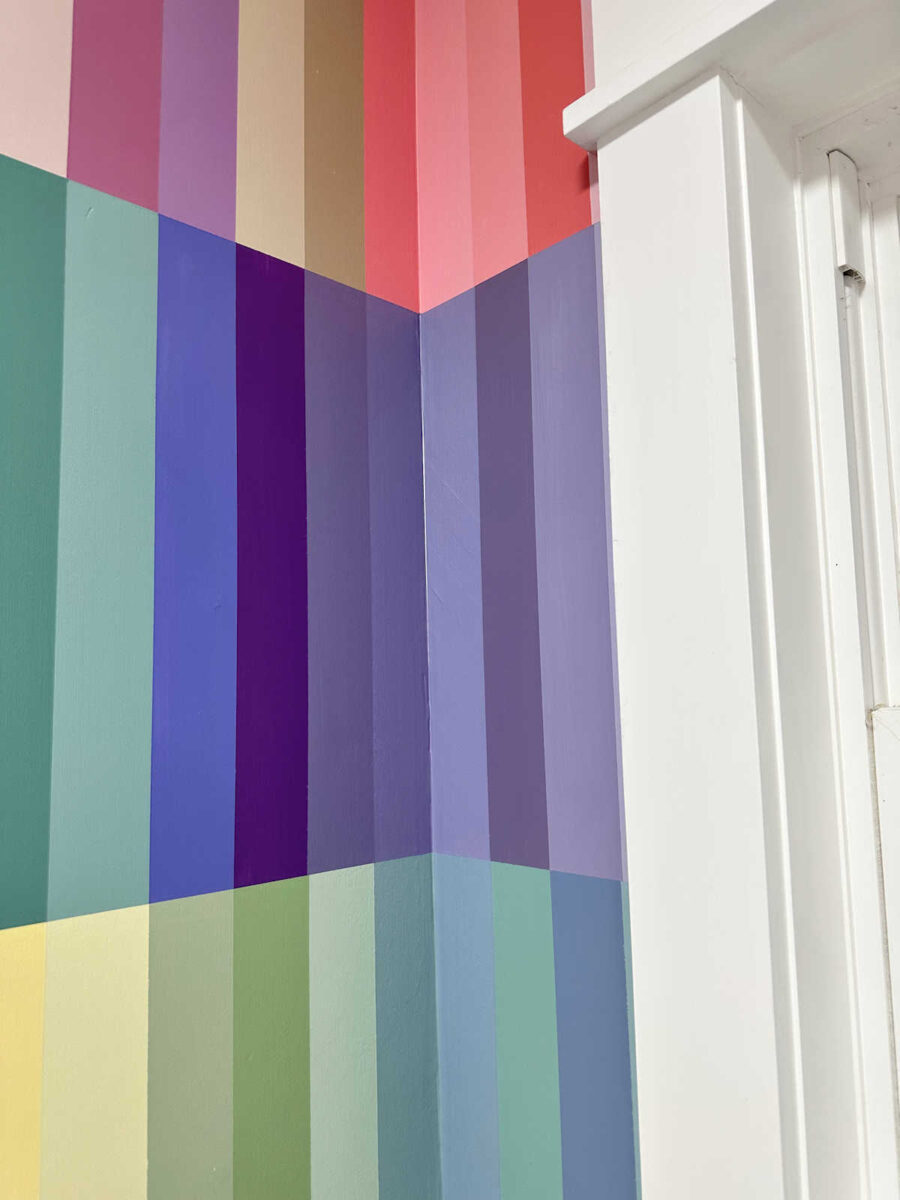
I additionally had a bother spot right here within the nook the place I couldn’t get the tape lined up completely proper within the nook, so I’ve this white sliver of wall displaying. I’ll want to the touch that up with a small artist brush.
I had this tiny space on the sunshine pink stripe that peeled off.
After which I had the identical drawback on this nook the place I had bother getting the painters tape in precisely the proper spot. So corners are slightly difficult, however that touchup is straightforward sufficient.

However general, these stripes are fairly darn excellent. Utilizing that moist rag over the sides of the tape earlier than portray was key, and I had just about zero paint bleed beneath the tape. There are perhaps two exceptions, however that was because of small uneven bumps within the floor of the wall (like one thing had gotten into the paint as I rolled it on) and never because of the failure of the tape. Aside from a few areas the place that occurred, the traces are fairly excellent. I used to be astounded, to be fairly sincere.
And right here’s the aftermath. It is a fairly tiny rest room, and I nonetheless have one drawback wall to cope with, so I’m not even utterly completed but. And I went via 5 rolls of painters tape. 😀
However it was completely value it! I’d do it over again if I needed to as a result of, like I stated, that is arms down my favourite wall design I’ve ever executed.
I can’t wait to get this rest room completed and get the entire space cleaned up in order that I can provide you a view of those partitions and this rest room from the studio. After I sit at my desk and get the entire view of the again entry with the floral curtains, the lavatory partitions, and the cupboards with the entire paint samples painted on them, it’s completely a feast for the eyes (when you love coloration as a lot as I do). And so they all go collectively so completely. However I’ll need to share {that a} bit later. For now, the entire space seems like a twister went via. 😀
Extra About My Studio Toilet
see all studio
rest room diy tasks
learn all studio
rest room weblog posts

Addicted 2 Adorning is the place I share my DIY and adorning journey as I transform and enhance the 1948 fixer higher that my husband, Matt, and I purchased in 2013. Matt has M.S. and is unable to do bodily work, so I do the vast majority of the work on the home on my own. You can learn more about me here.
Trending Merchandise

UpCircle Rodillo de ojos 1 pieza – Para...

ESSENCE BRILLO DE LABIOS VOLUMINIZADOR WHAT T...


COSRX Advanced Snail 92 All in One Cream, 100...


